Jonny Crossbones: Down Hanover Wash is an ongoing adventure comic for all ages. Follow Jonny, a young auto mechanic in a skeleton suit, as he and Gretchen Fiveash, the niece of a wealthy adventurer, navigate an eventful lakeside vacation while learning more about themselves and their unknown, shared past!
First time readers might be best served by starting at the beginning of Jonny's First adventure, Dead Man at Devil's Cove.
It’s been a long time since I made a post going over my drawing process! The last time I wrote about it here was way back in 2006. My process is very nearly 100% different now.
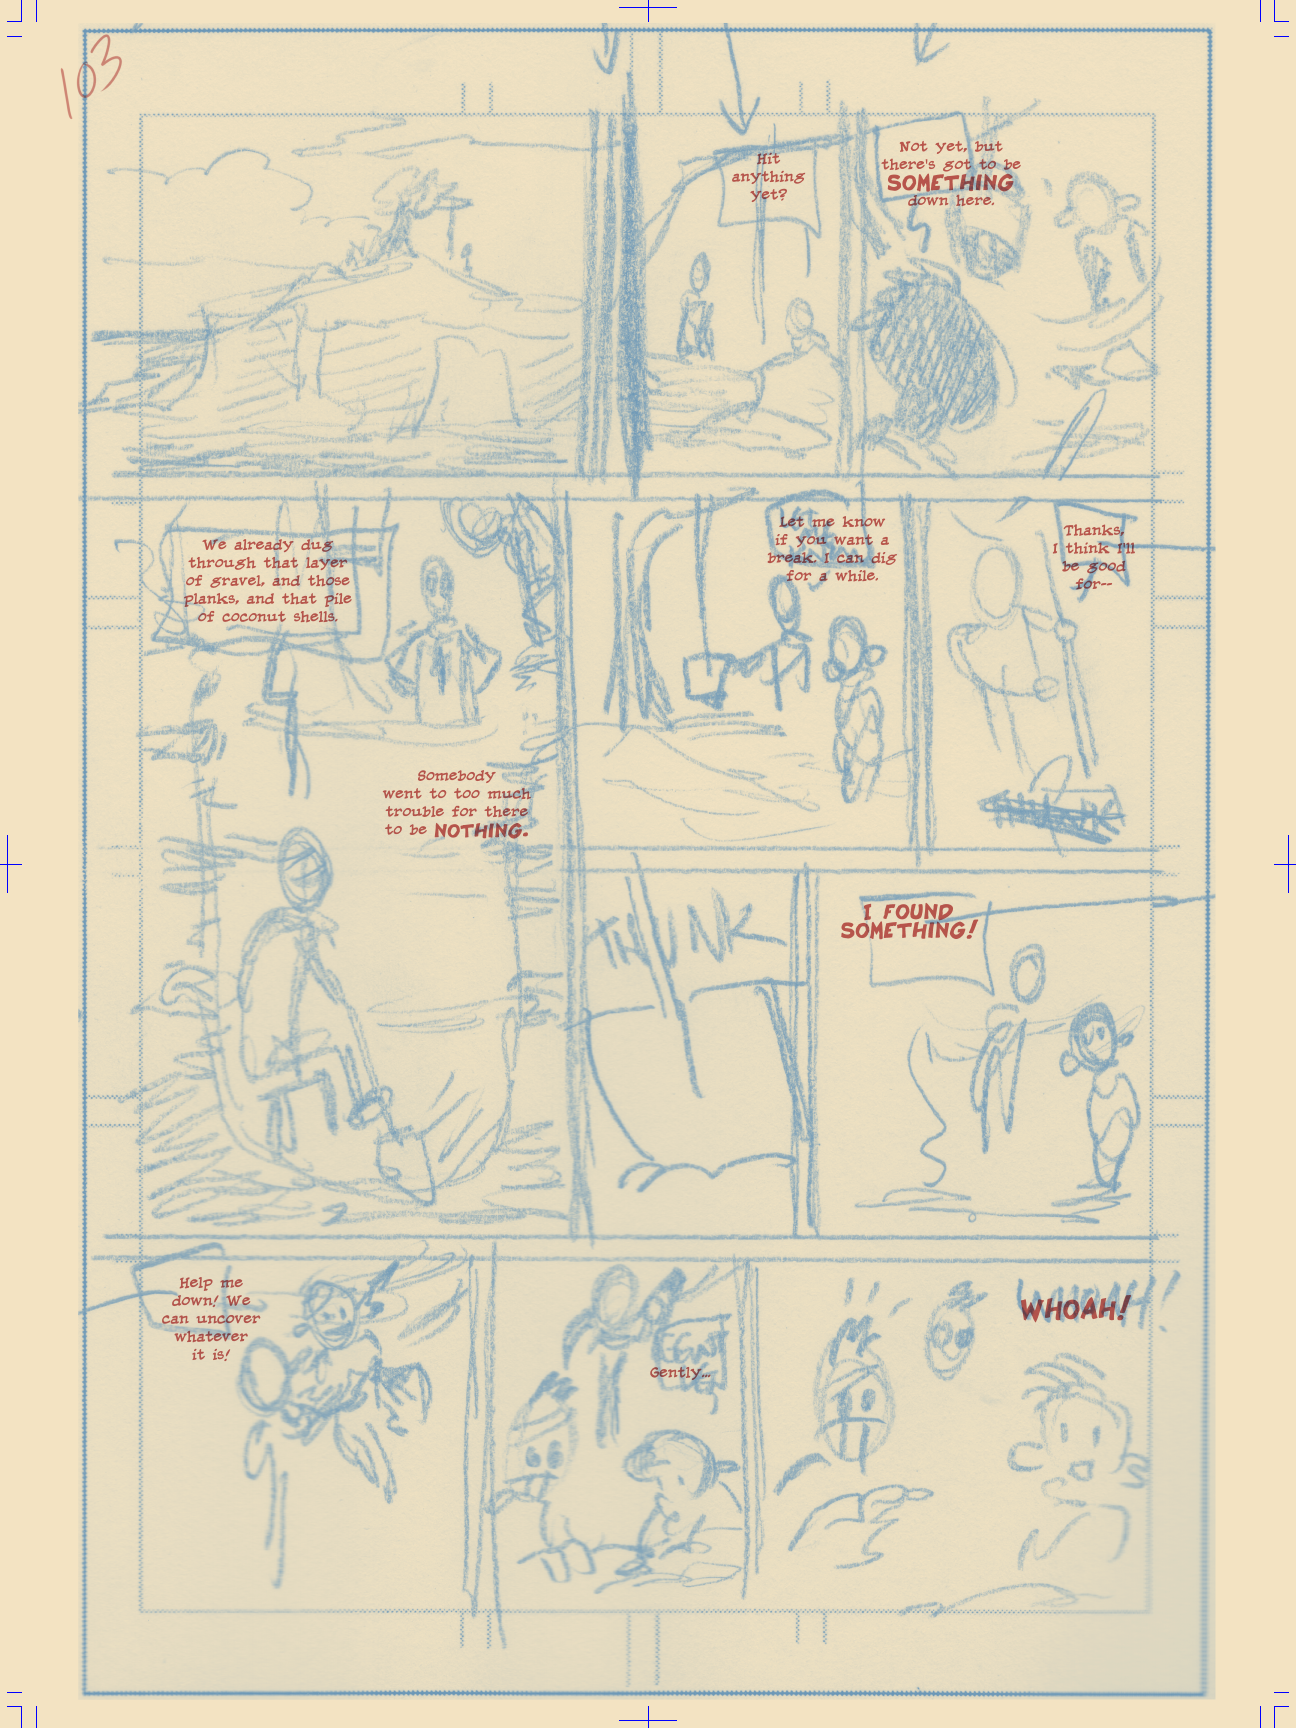
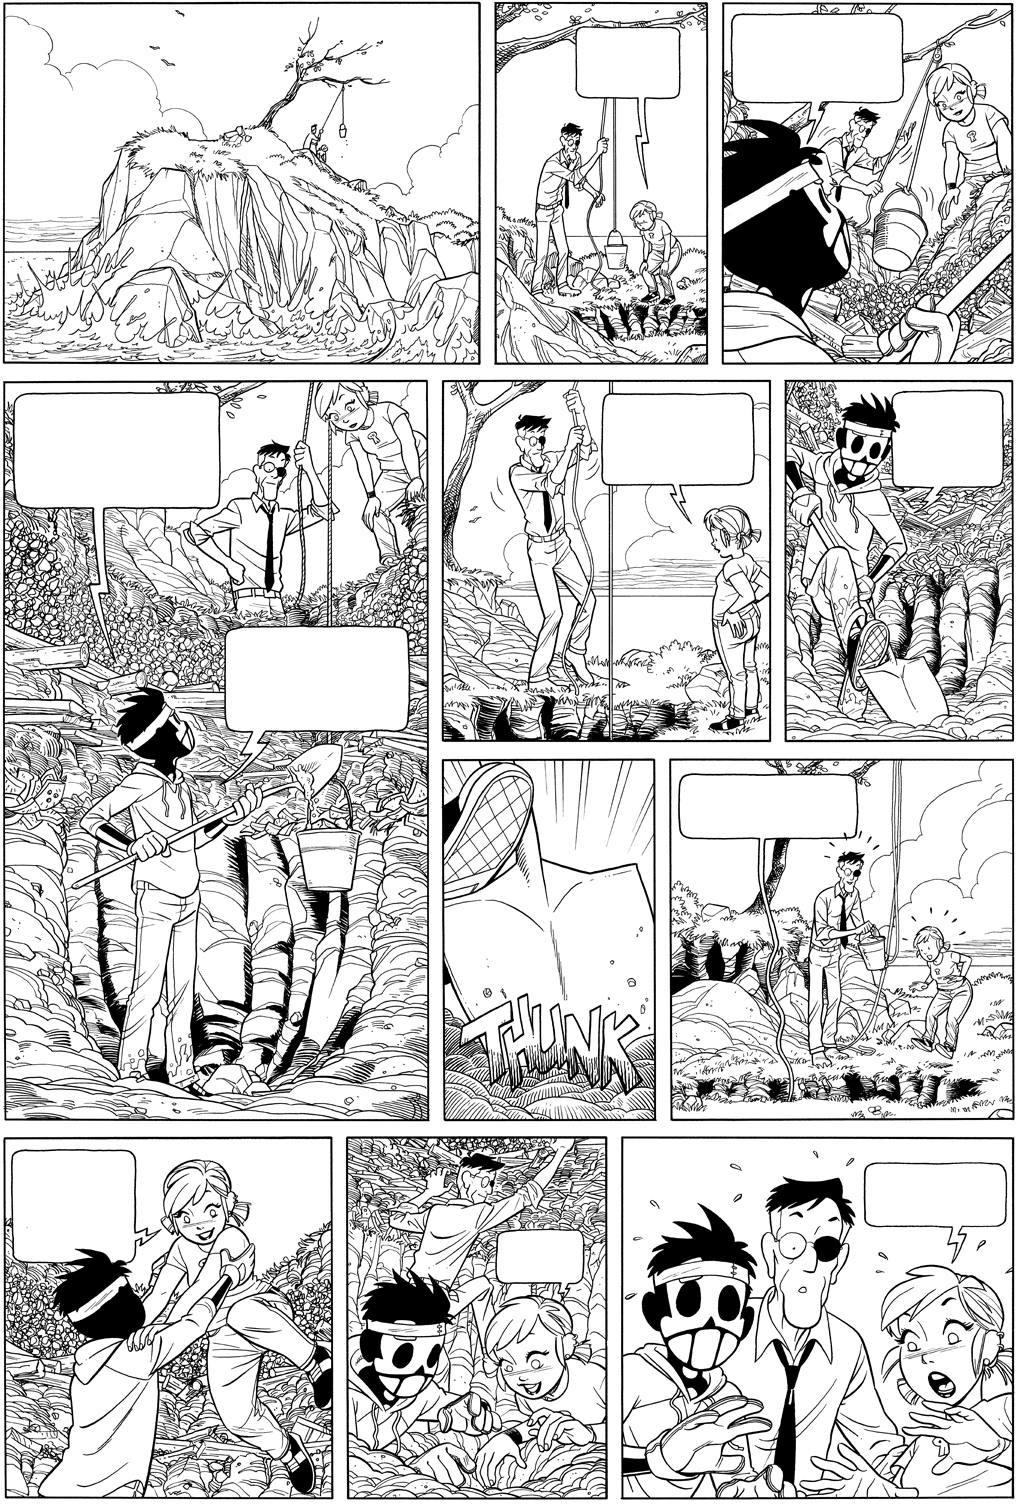
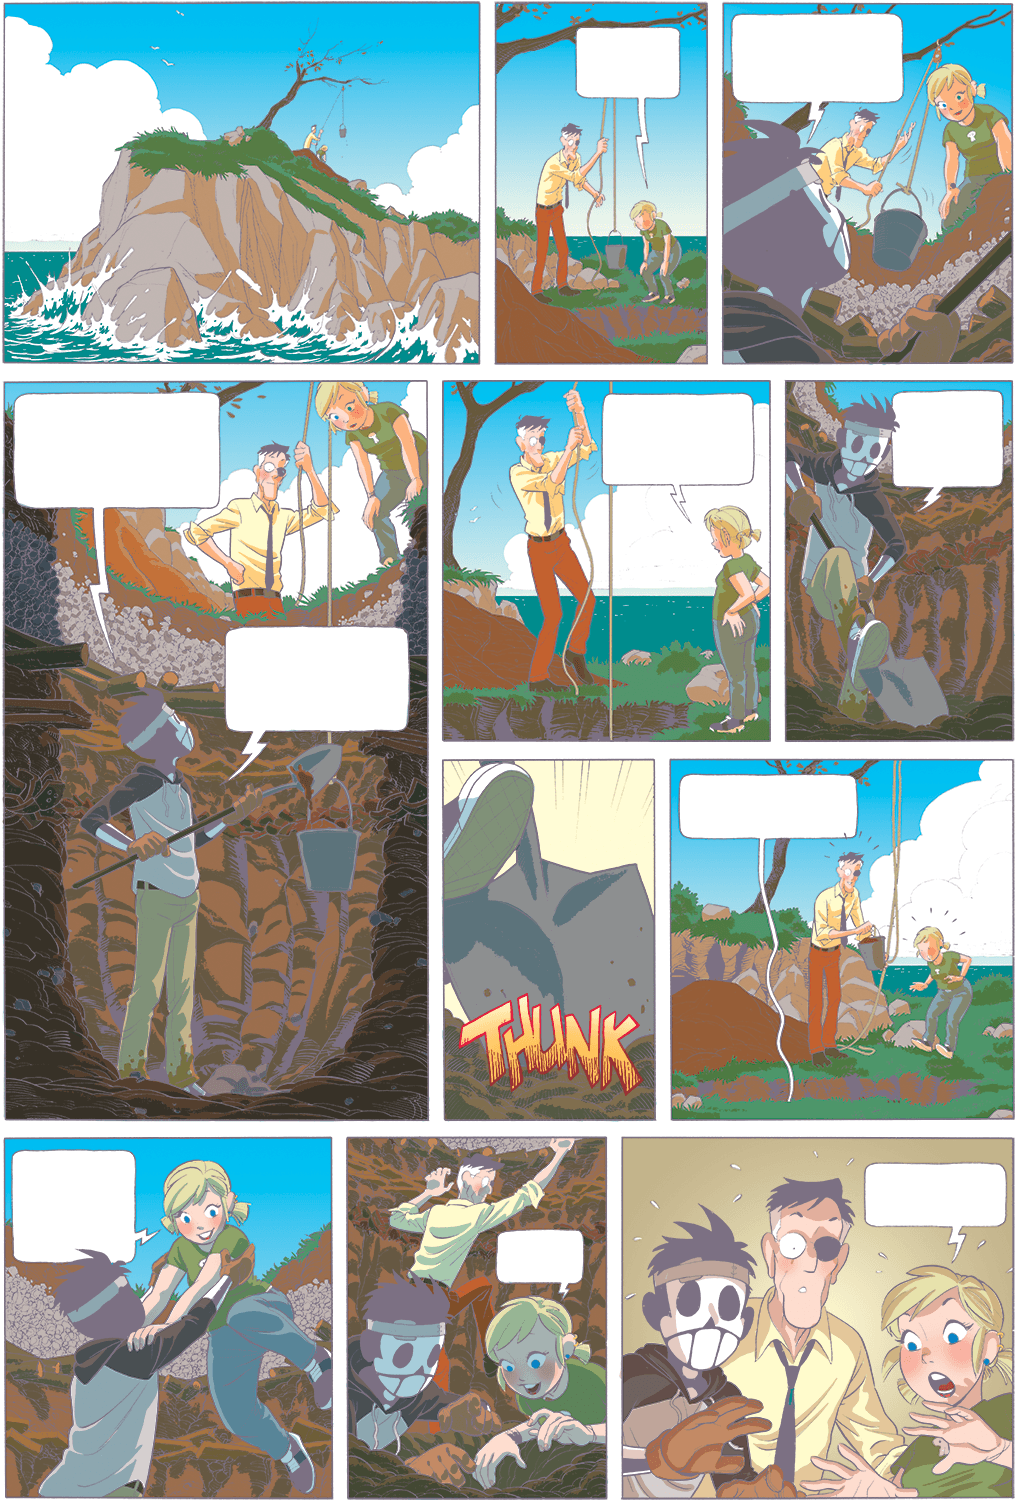
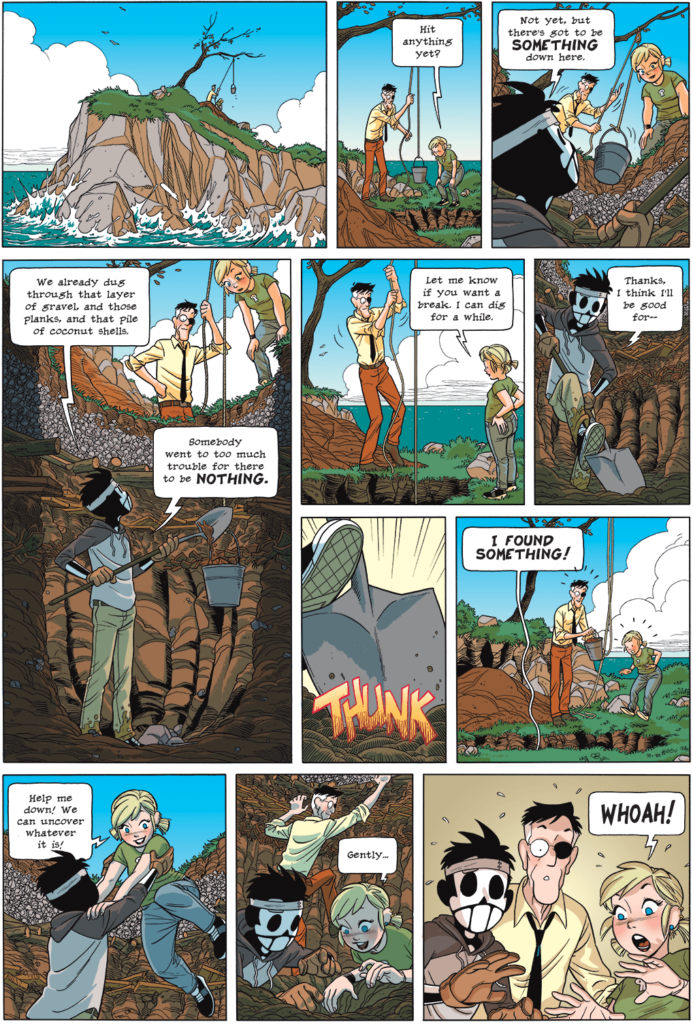
I start with my page layout. I finished laying out most of the rest of this story back in 2016, so I’ve had this page sketched in my notebook for two years now!
I draw this very roughly, just to give myself an idea of what I’m putting in each panel. I also have the script written down in another notebook.
At this point I do my initial lettering! I’m using Clip Studio Paint, a great drawing app with a terrible text engine. Luckily, I don’t need to do anything fancy here. I just want to make sure I have enough room for the dialogue when I start doing the drawings.
Here are my rough pencils! Not too much detail, I’m just trying to make sure I have the structure of the figures more or less right and all in the right places.
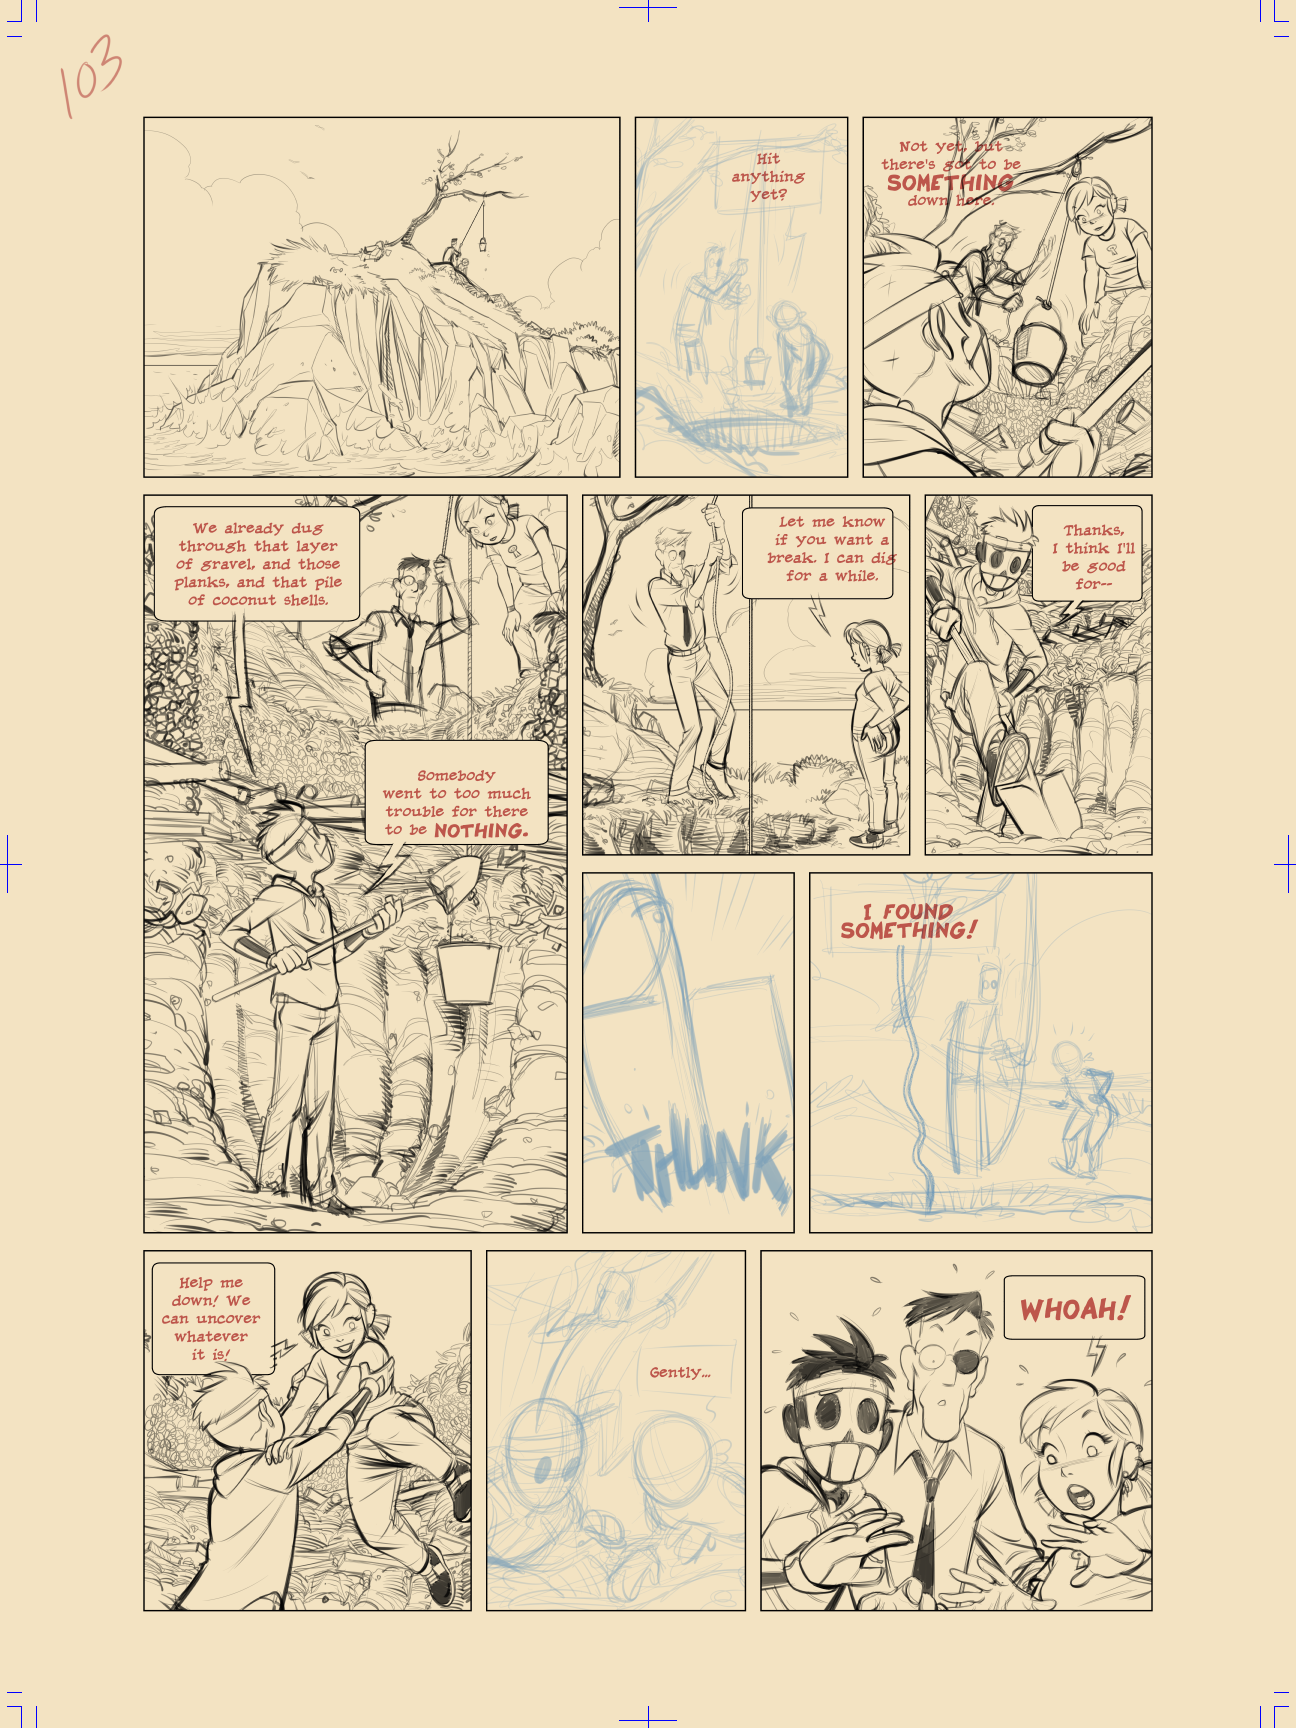
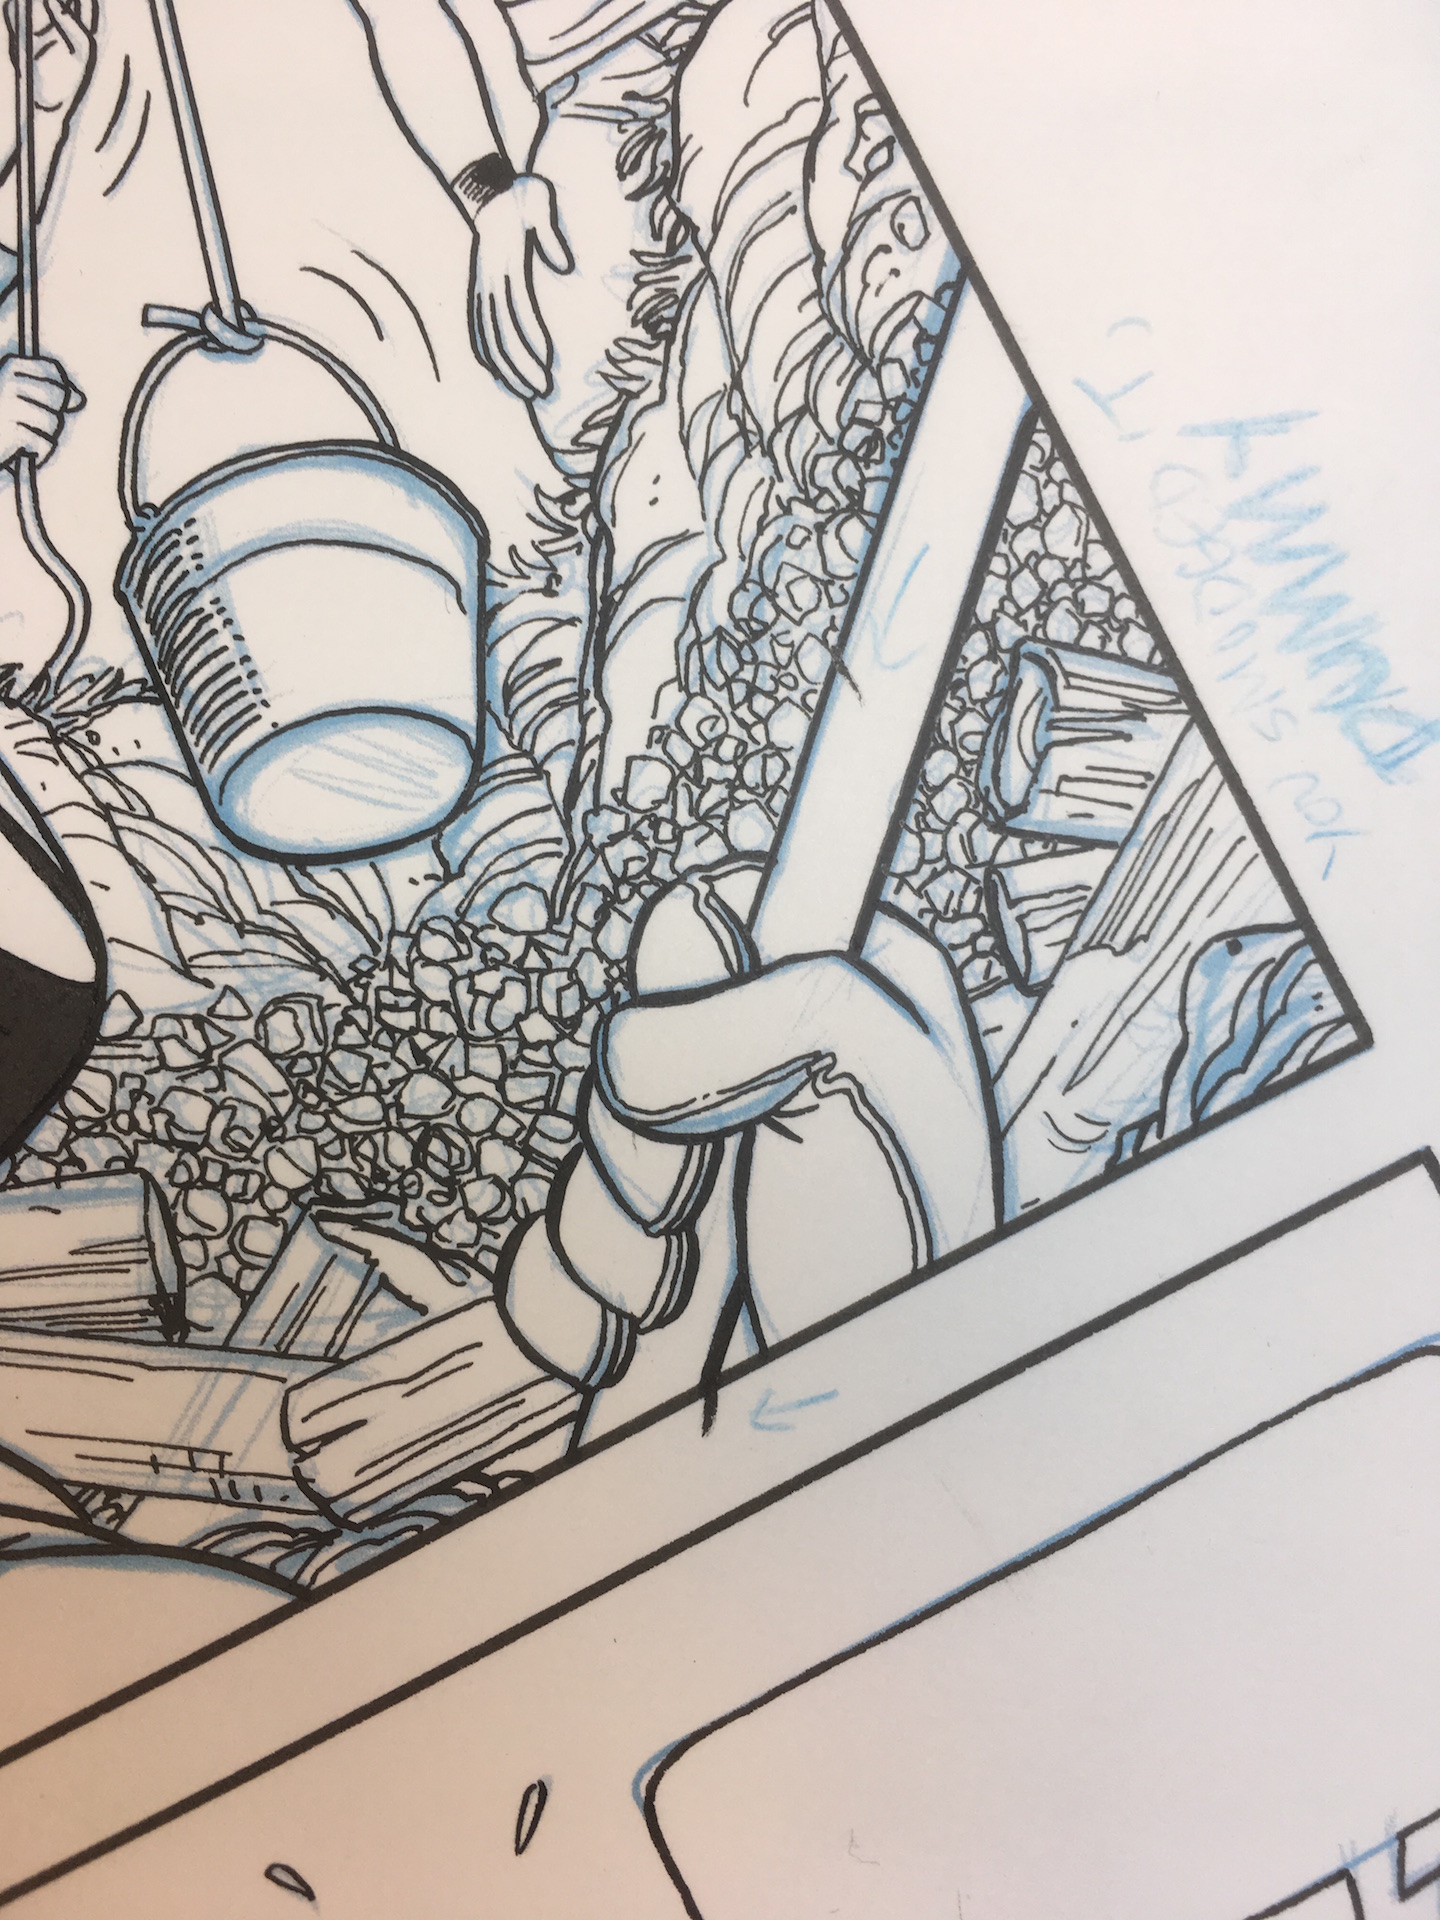
Now I start drawing my finished pencils. Getting to this point took me an entire work day– you can see that I’ve cleaned up the figures and worked out things like facial expressions and balloon placement. I also completely reposed Jonny in panel 4! I wanted to have a coherent set of actions with Jonny and Doc filling the bucket with dirt before hauling it out.
I spent a couple hours the next day getting the rest of the pencils done. I was thinking I’d spend the rest of the day inking, but I had printer trouble, and that prevented me from starting the inking phase.
I like to print out my digital pencils and ink them with a real pen and ink, so I need a printer to do that!
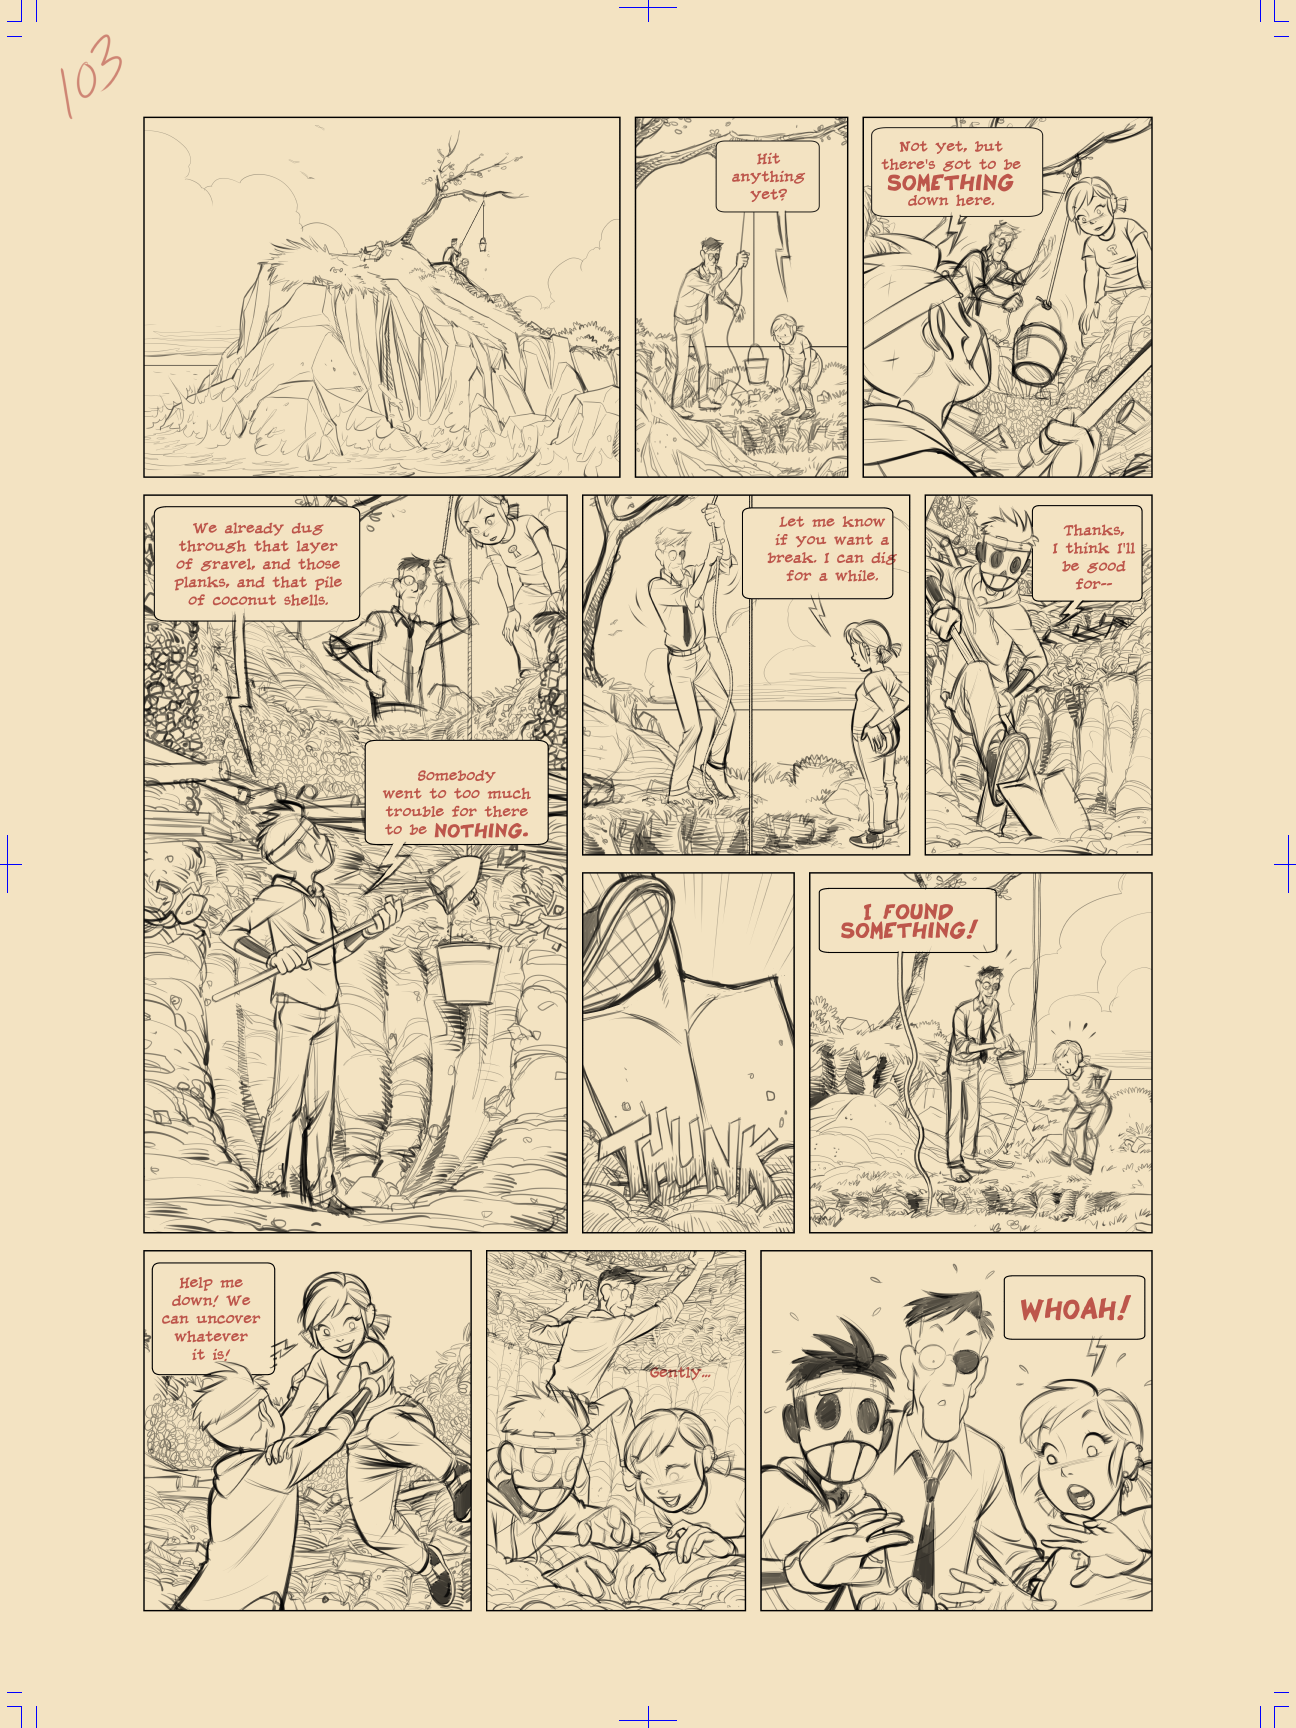
The next day, after a trip to the office supply store to fix my printer, I was able to get my pencils printed out. I print in blue, which is easy to remove from a scan after the inks are done. I also had to split this page up in a funny way, due to the tall panel in the middle. I draw each page at 18 inches by 24 inches, and my printer can only print on paper up to 14 inches wide. What I do is print each page on two sheets of 11×17 paper, and in this case, I had to put the top and bottom of the page together on one sheet, and the middle on another, due to the tall panel making it impossible to split down the middle like I usually do. I post a half a page a week, but when I finally get this book into print, it will look like a normal portrait-orientation page, not a short, wide one.
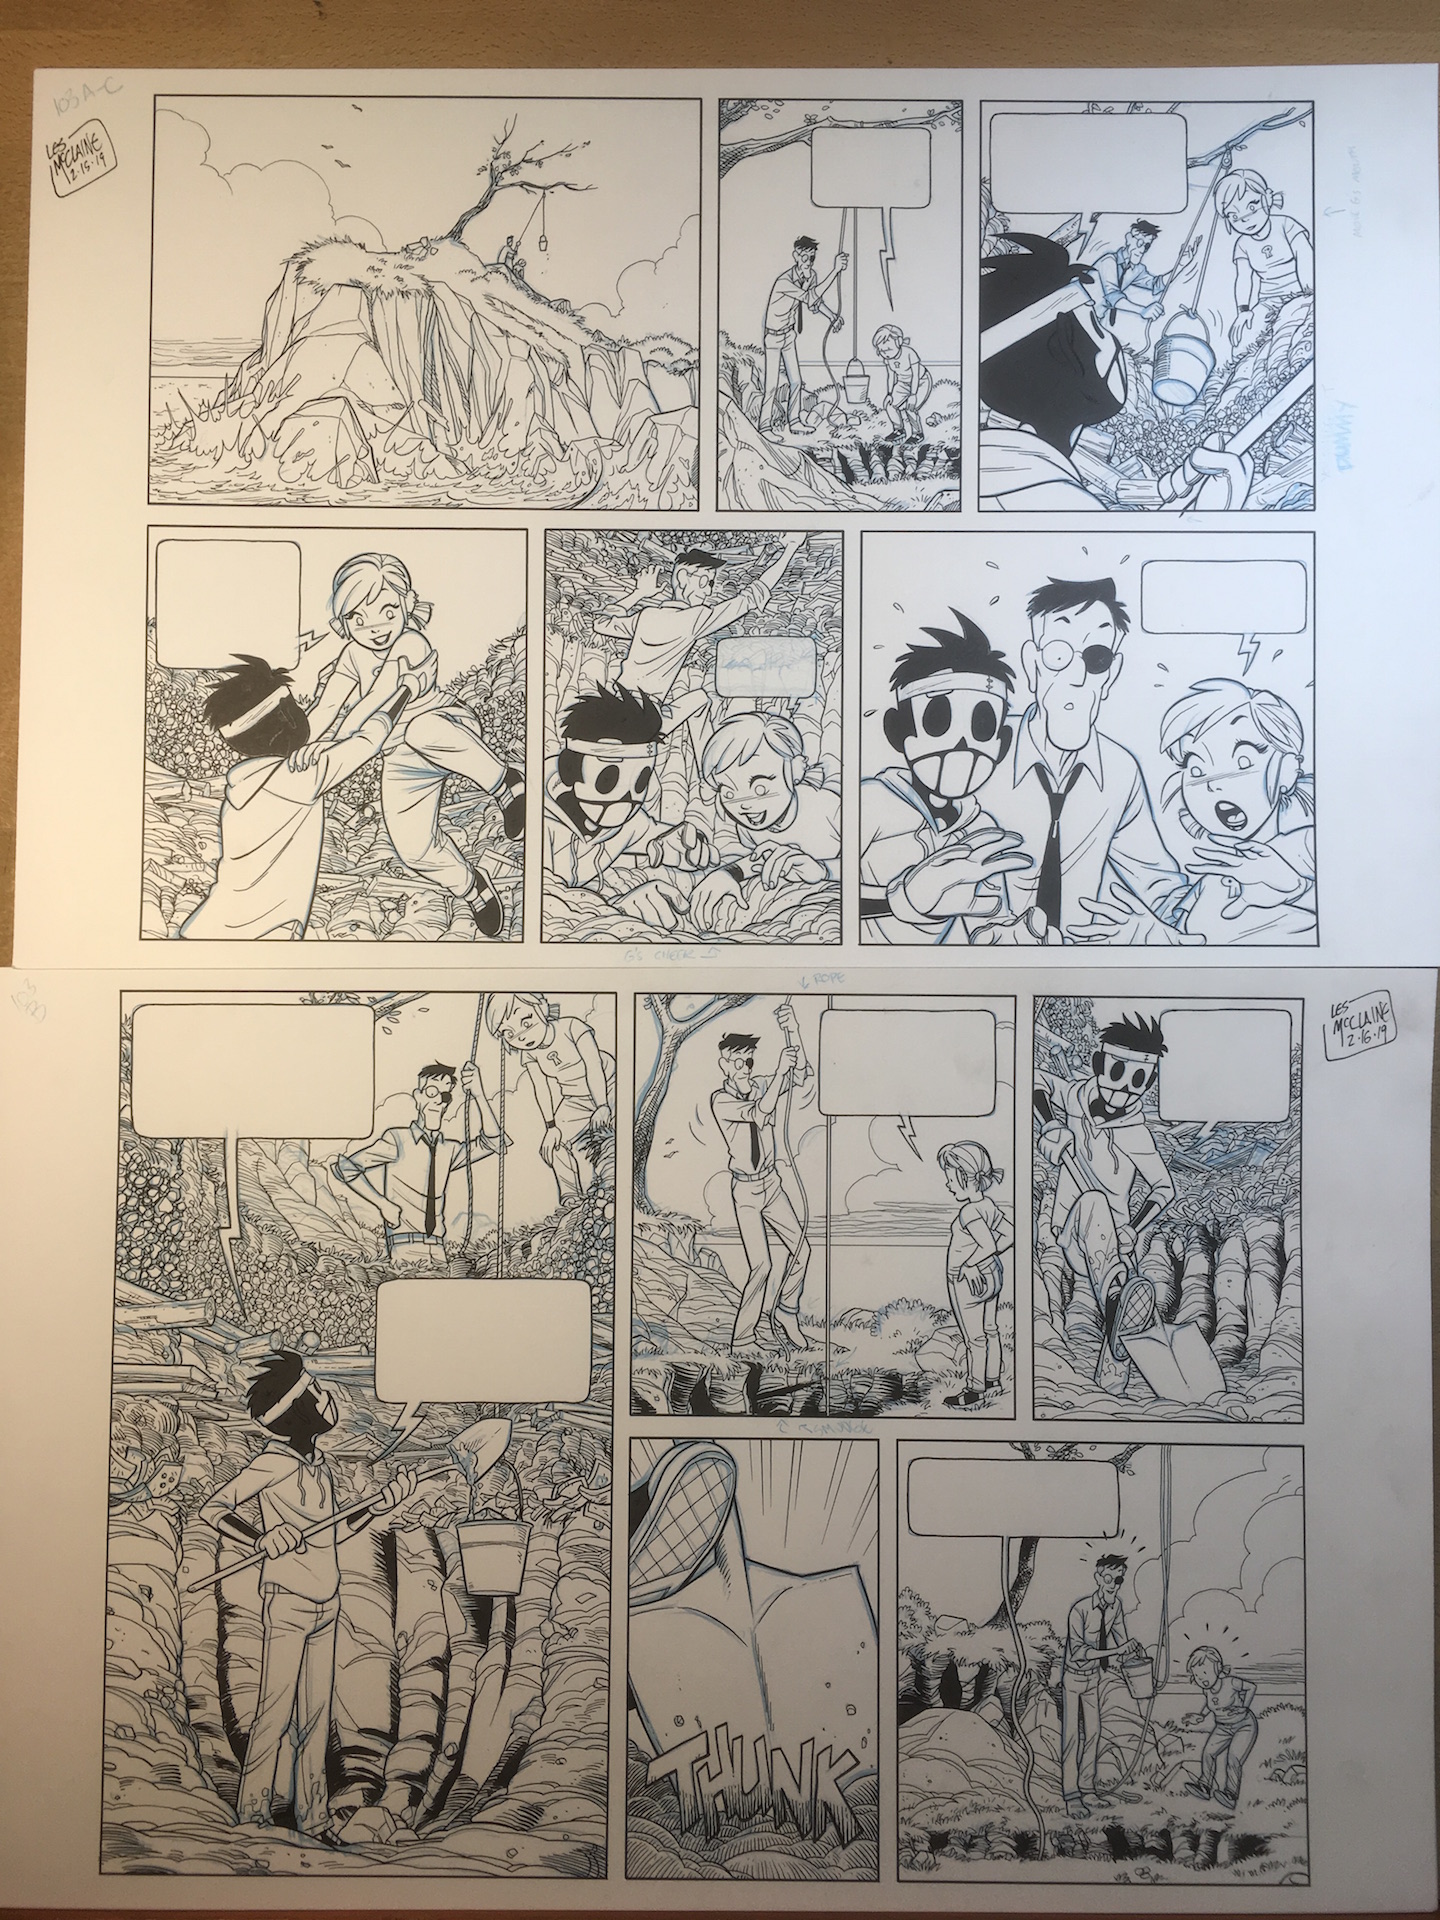
You can also see my regular inking tools here. Since 2015, I’ve been inking this comic with a Speedball Hunt 107 Hawk Quill pen, using Dr. Ph. Martin’s Bombay Black india ink. I do use felt tip Micron pens for things like panel borders, but most of the lines are drawn with the dip pen.
At the end of my work day, I’d managed to get almost the entire page inked. Remind me not to write any more gravel in to my comics.
After another couple hours the next day, I had all my linework finished.
After the linework is done, I go in with a brush and fill in all the large areas of black. Mostly Jonny’s head, Doc’s eyepatch, and things like that.
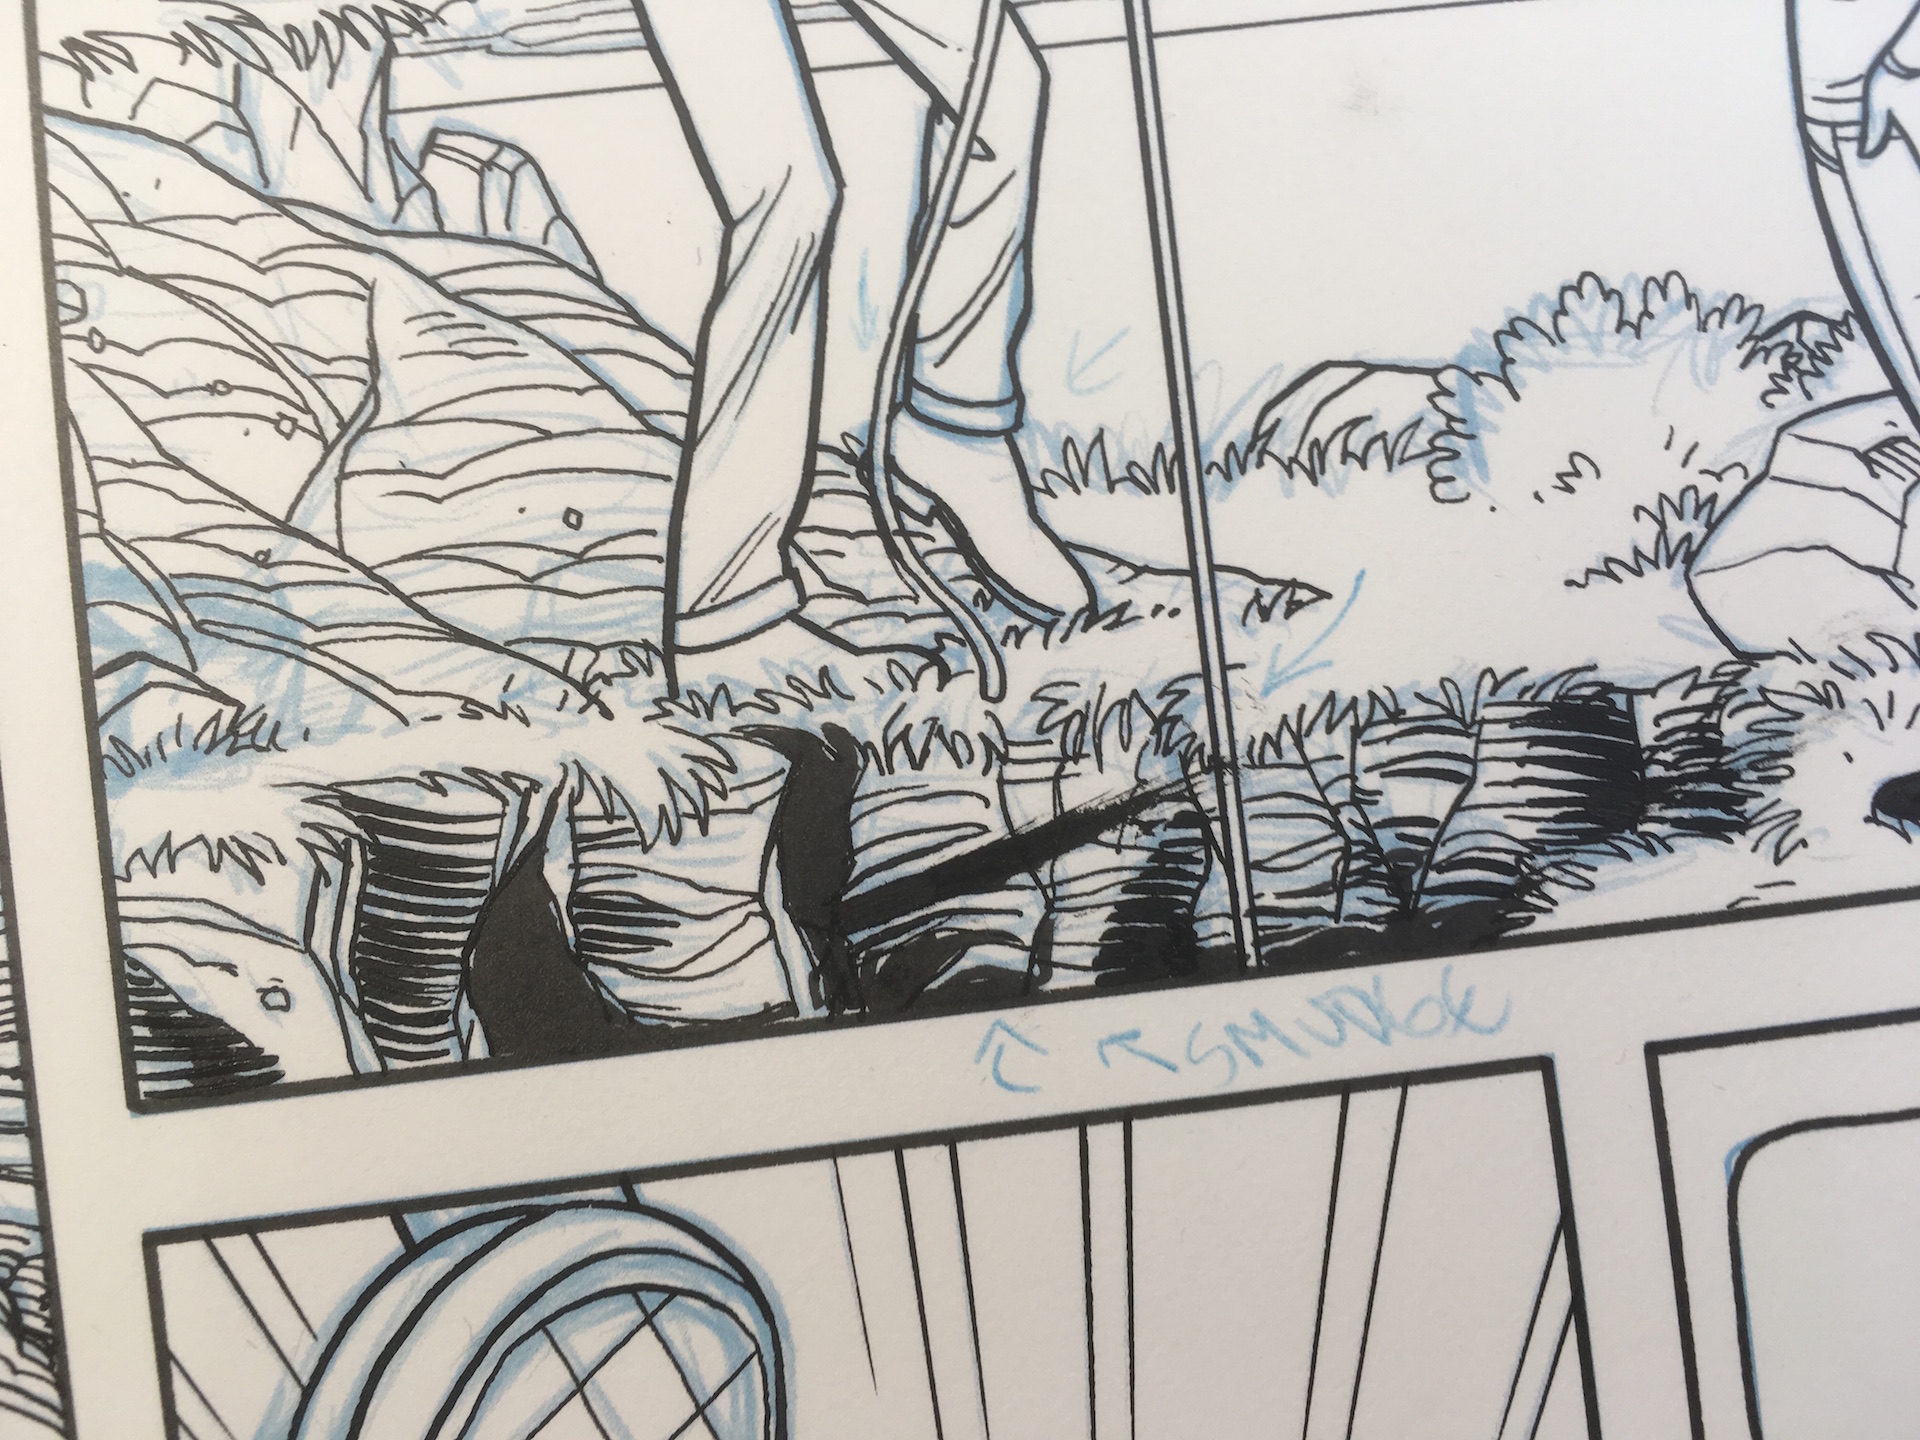
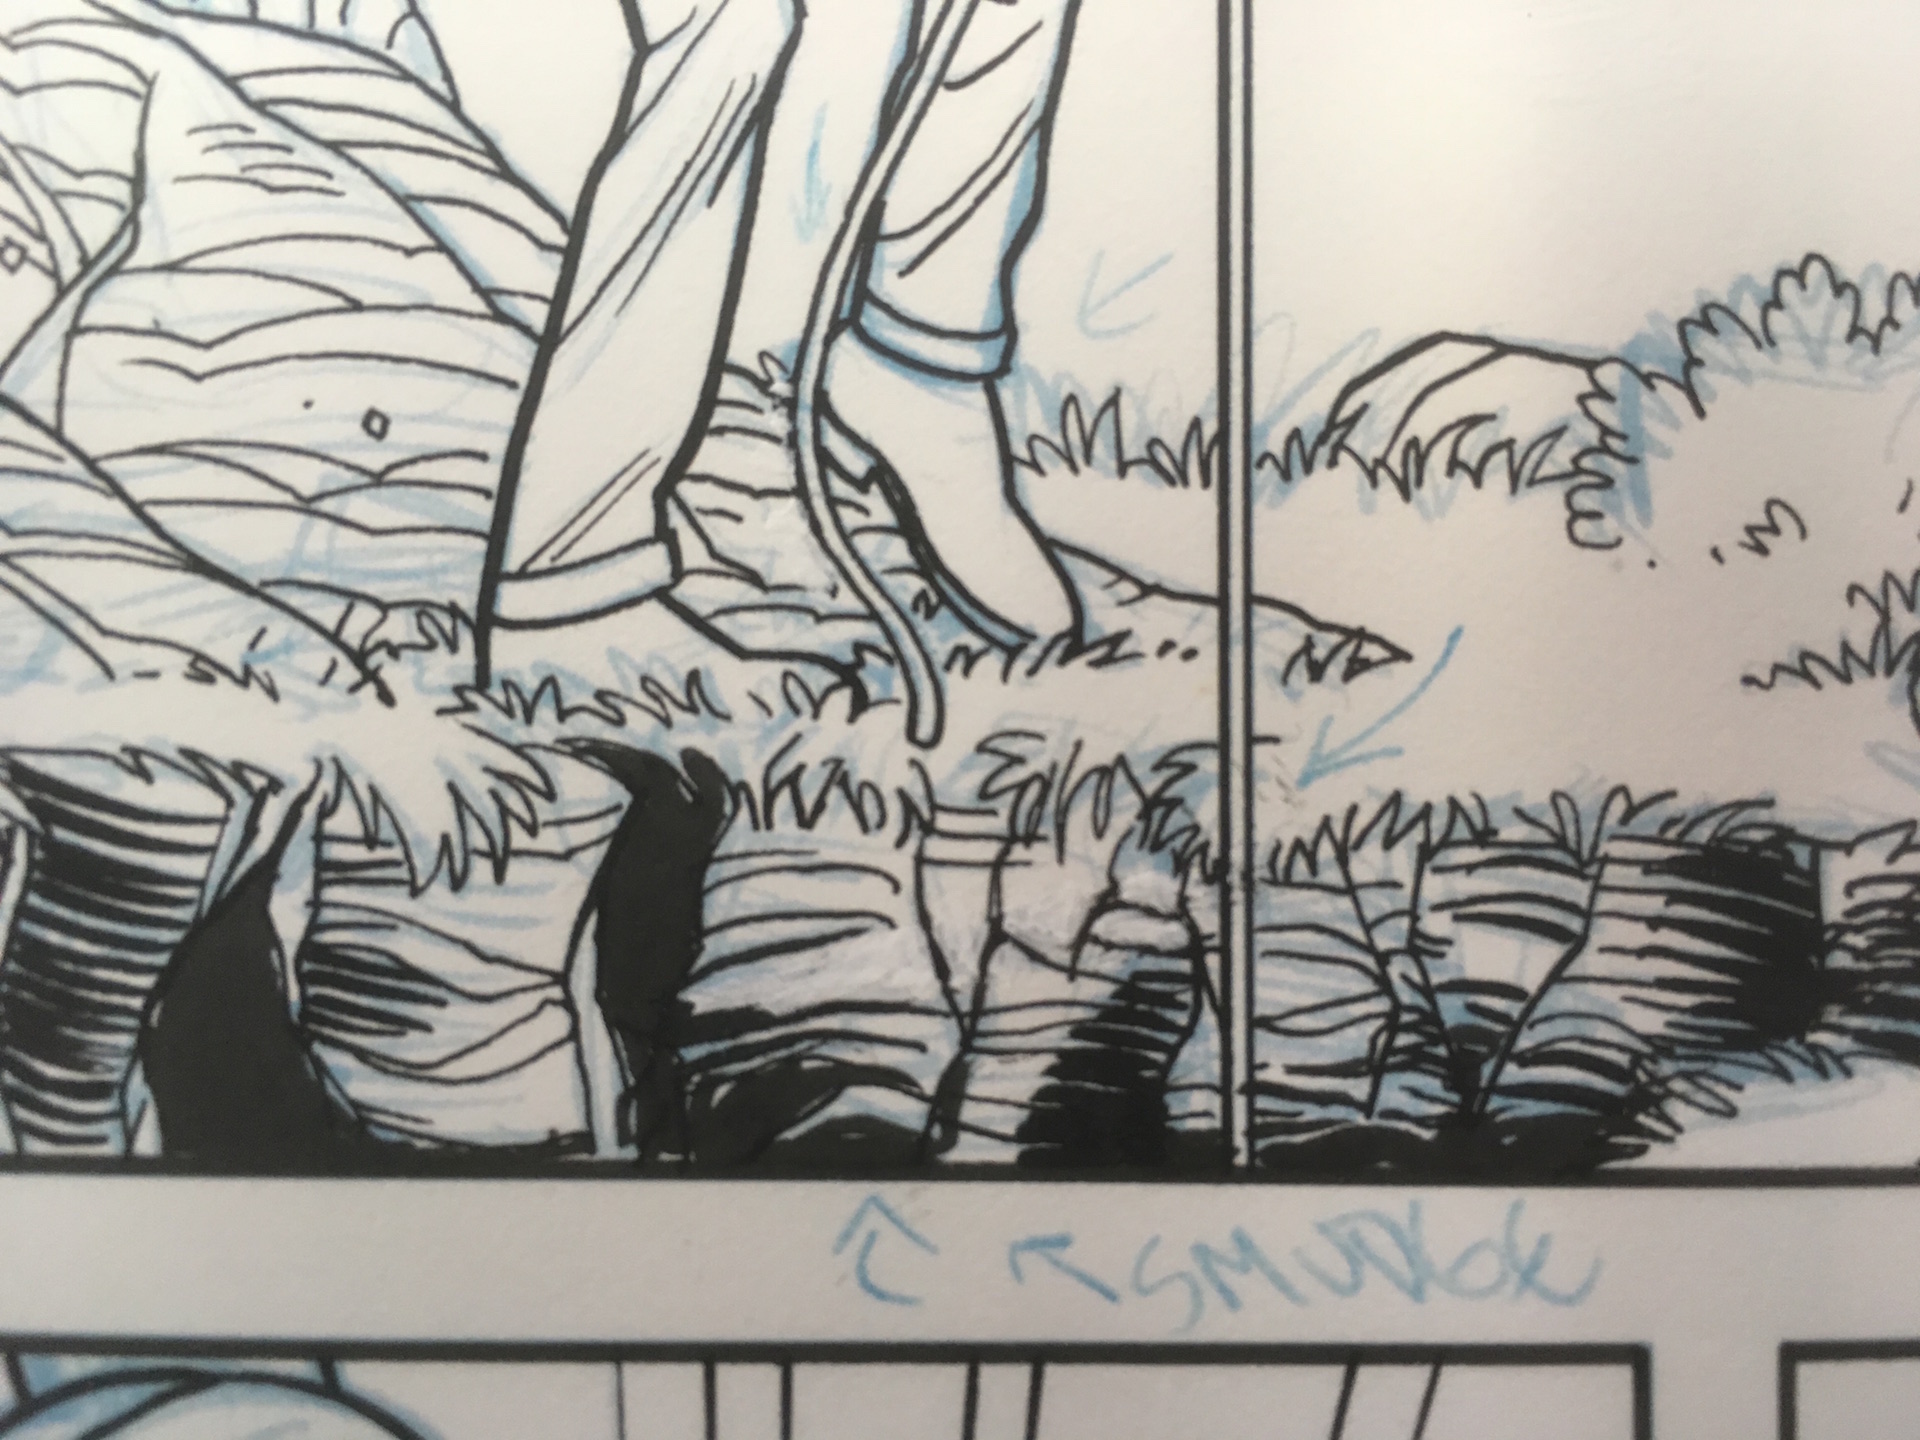
Extra lines on the rope, and a big smudge on the wall of the pit.
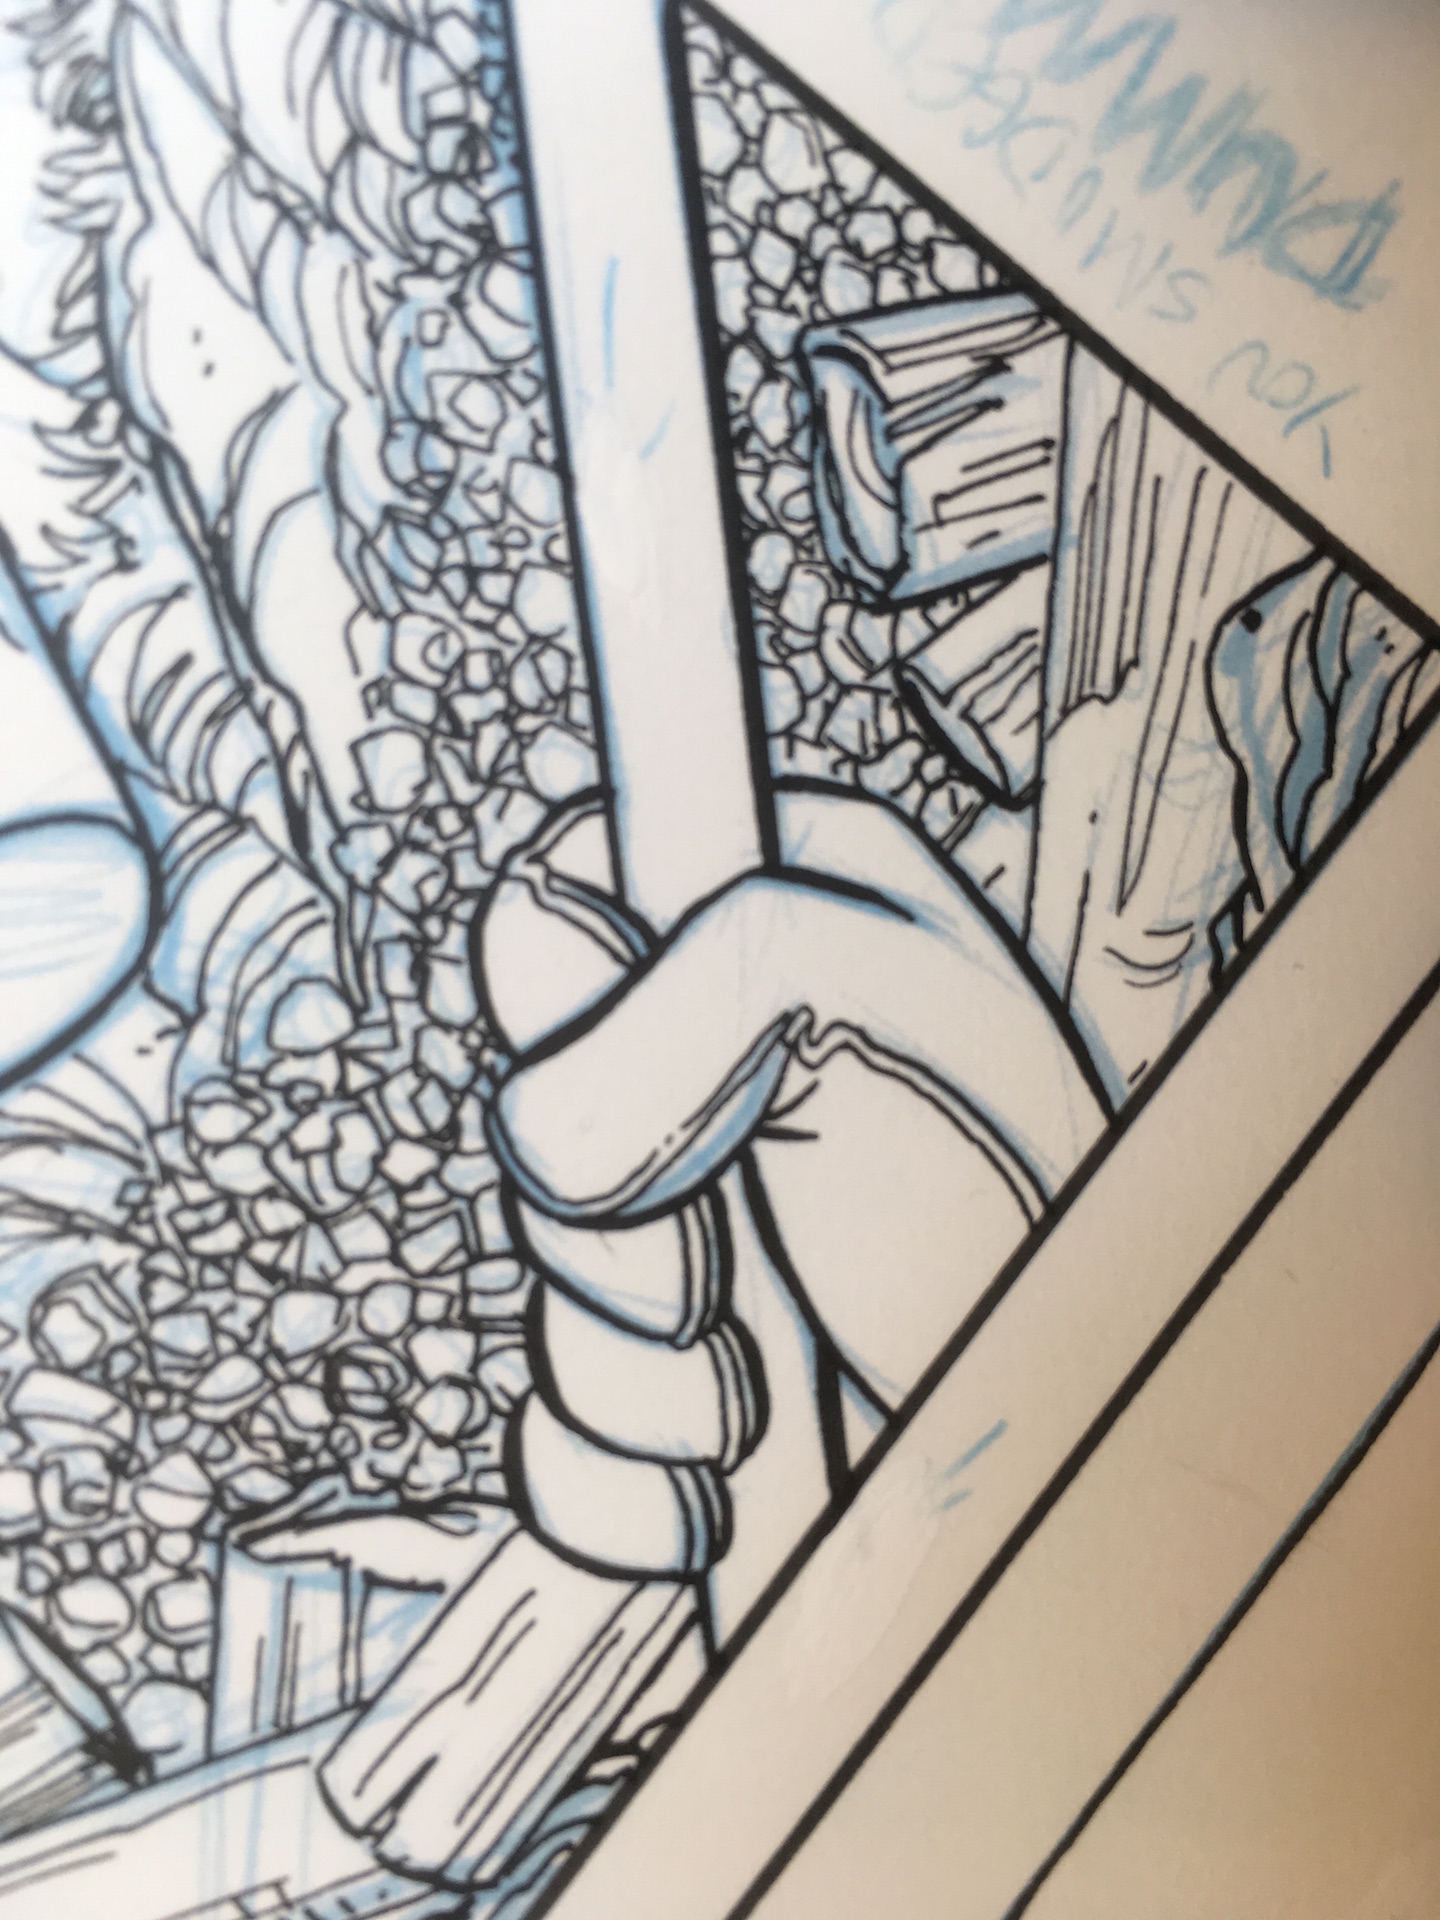
Within the first hour of inking, I smeared my hand along the lines of the shovel handle and made a mess.
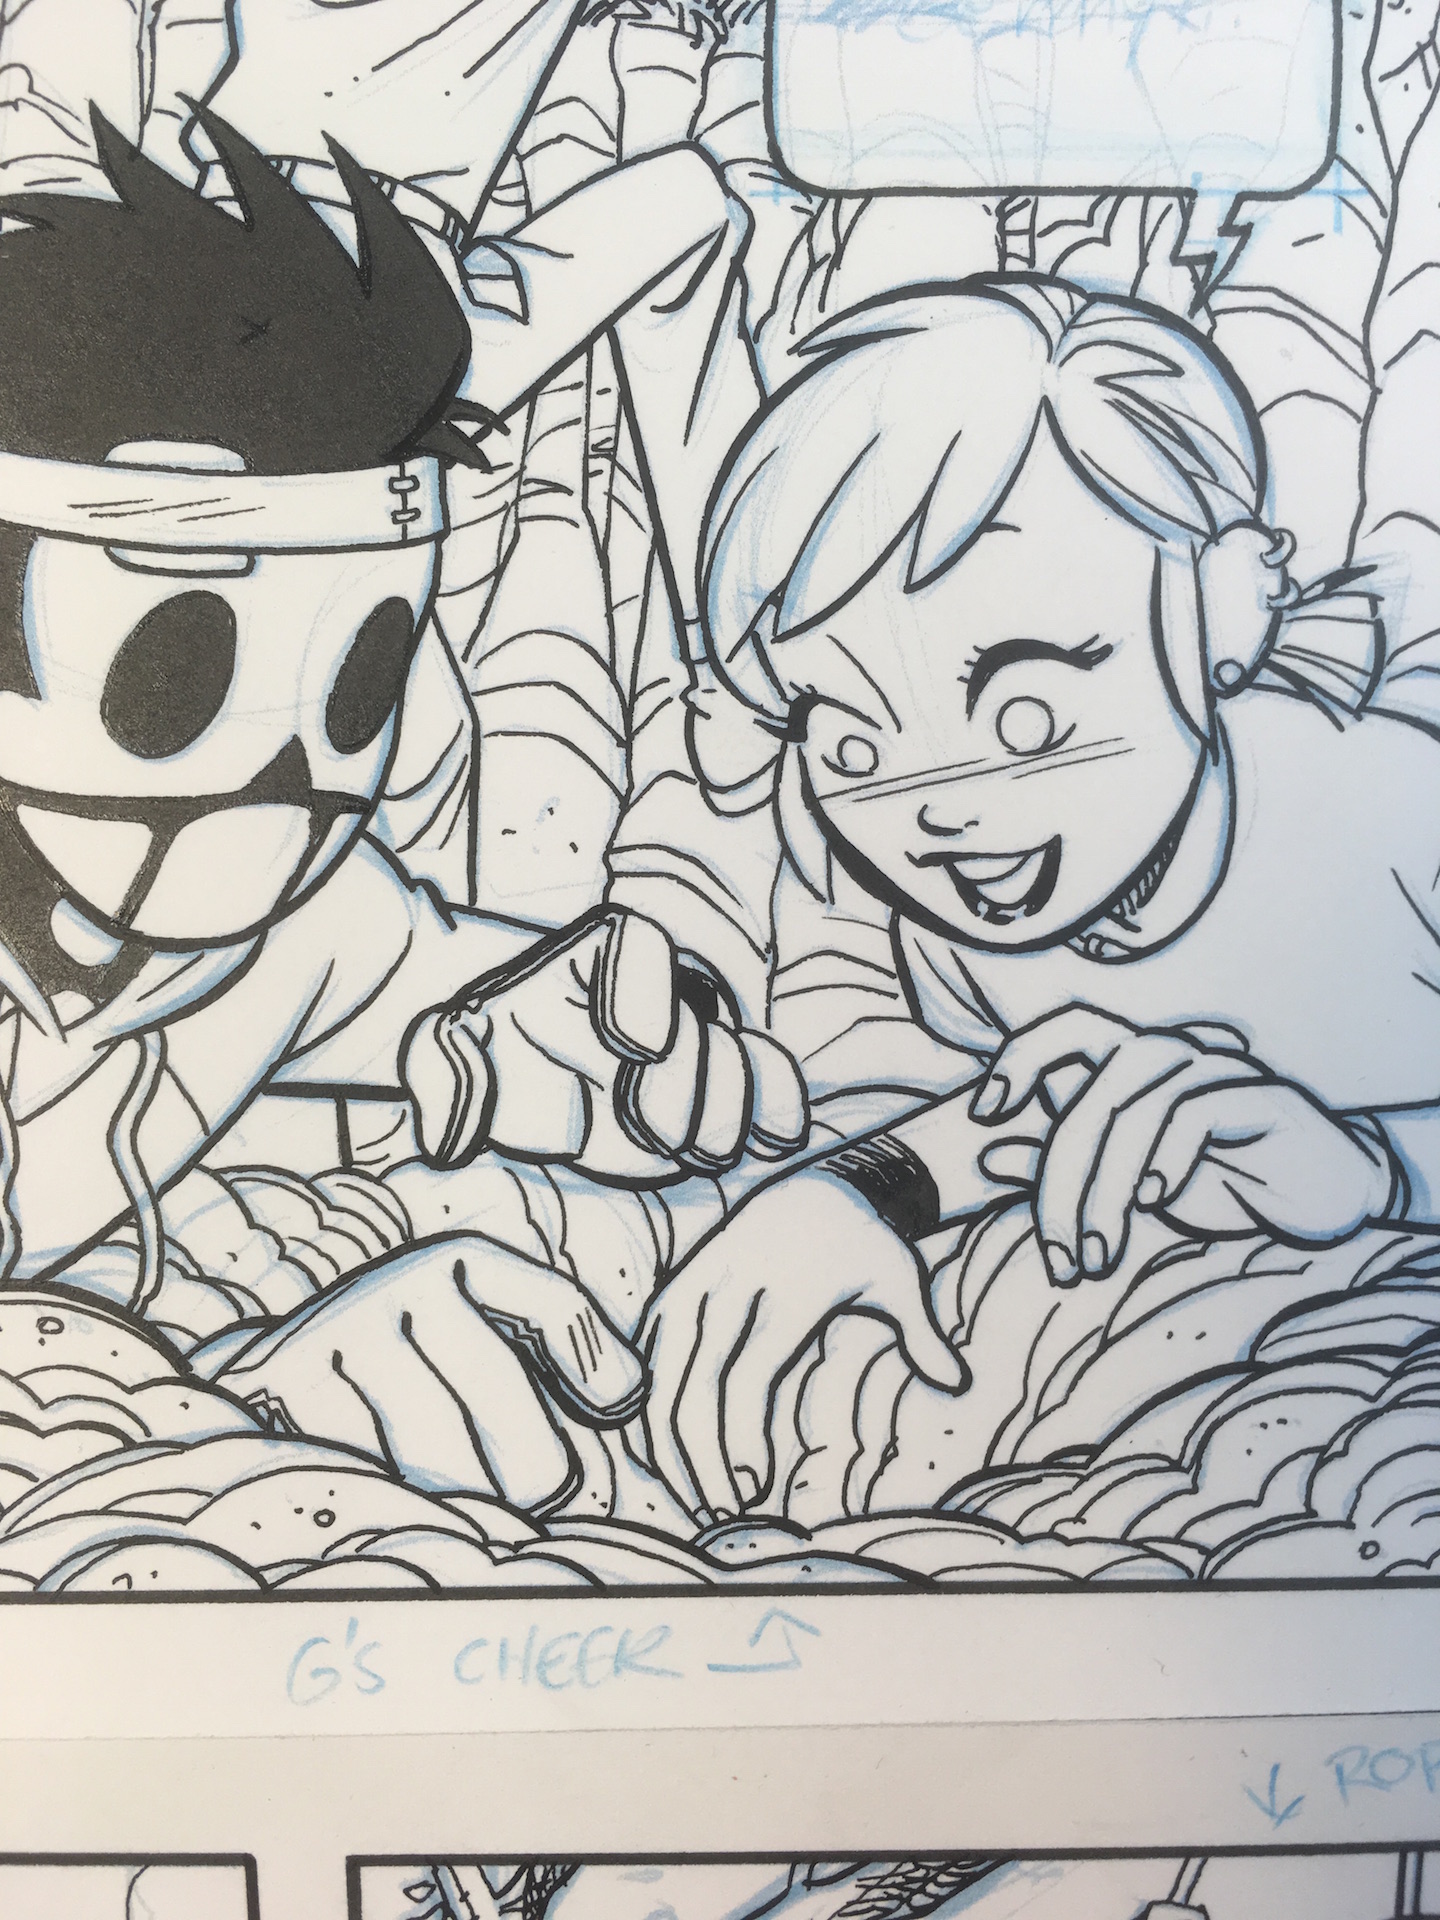
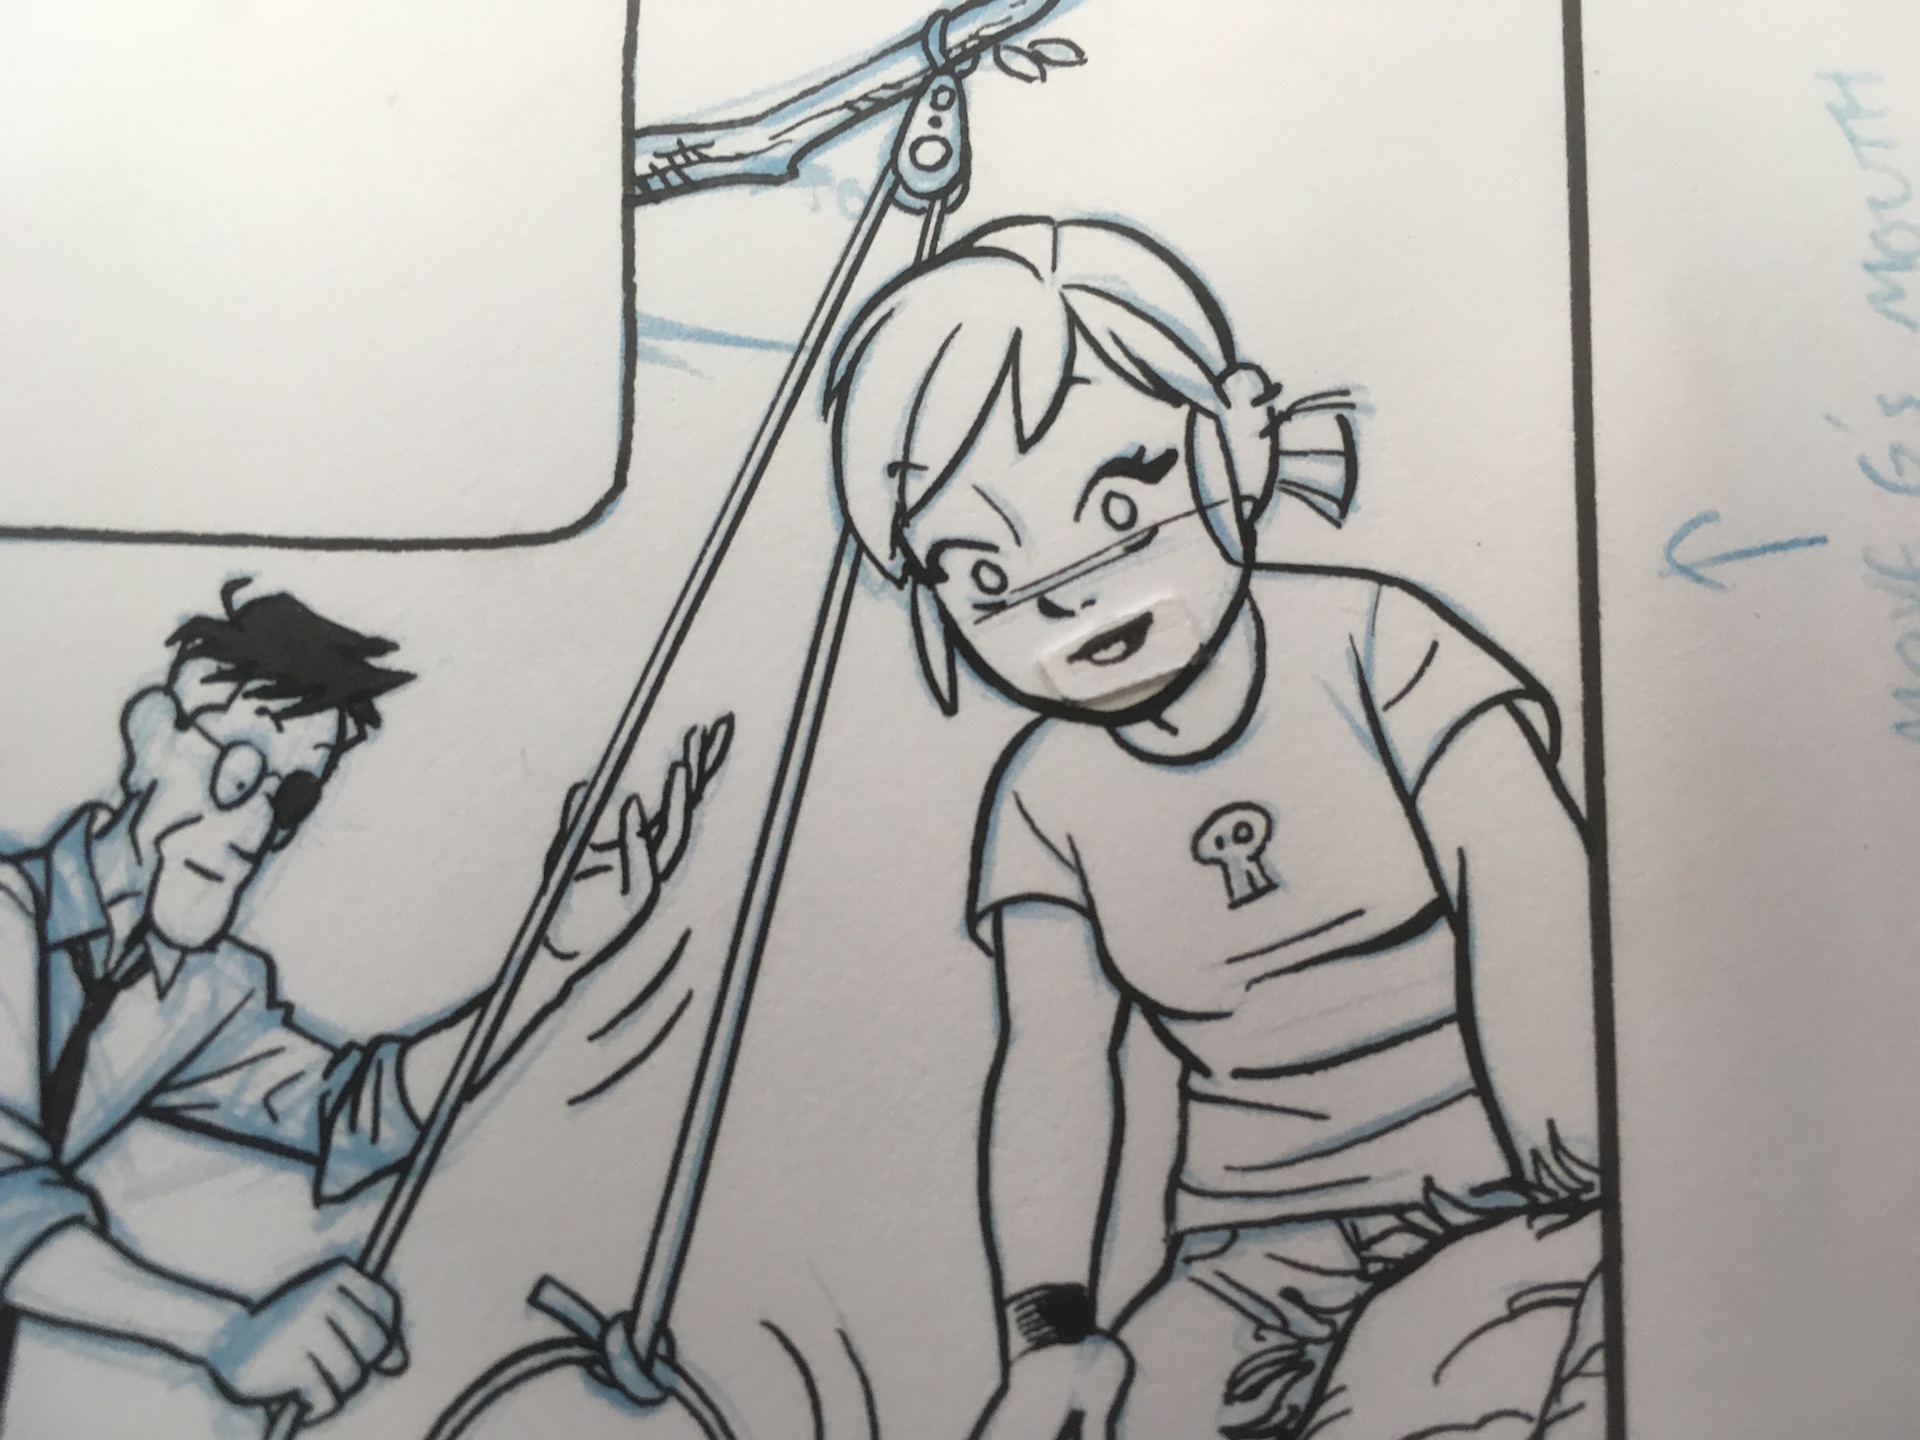
Gretchen’s mouth looked right in the pencils, but once I got to ink I realized it was too low on her face.
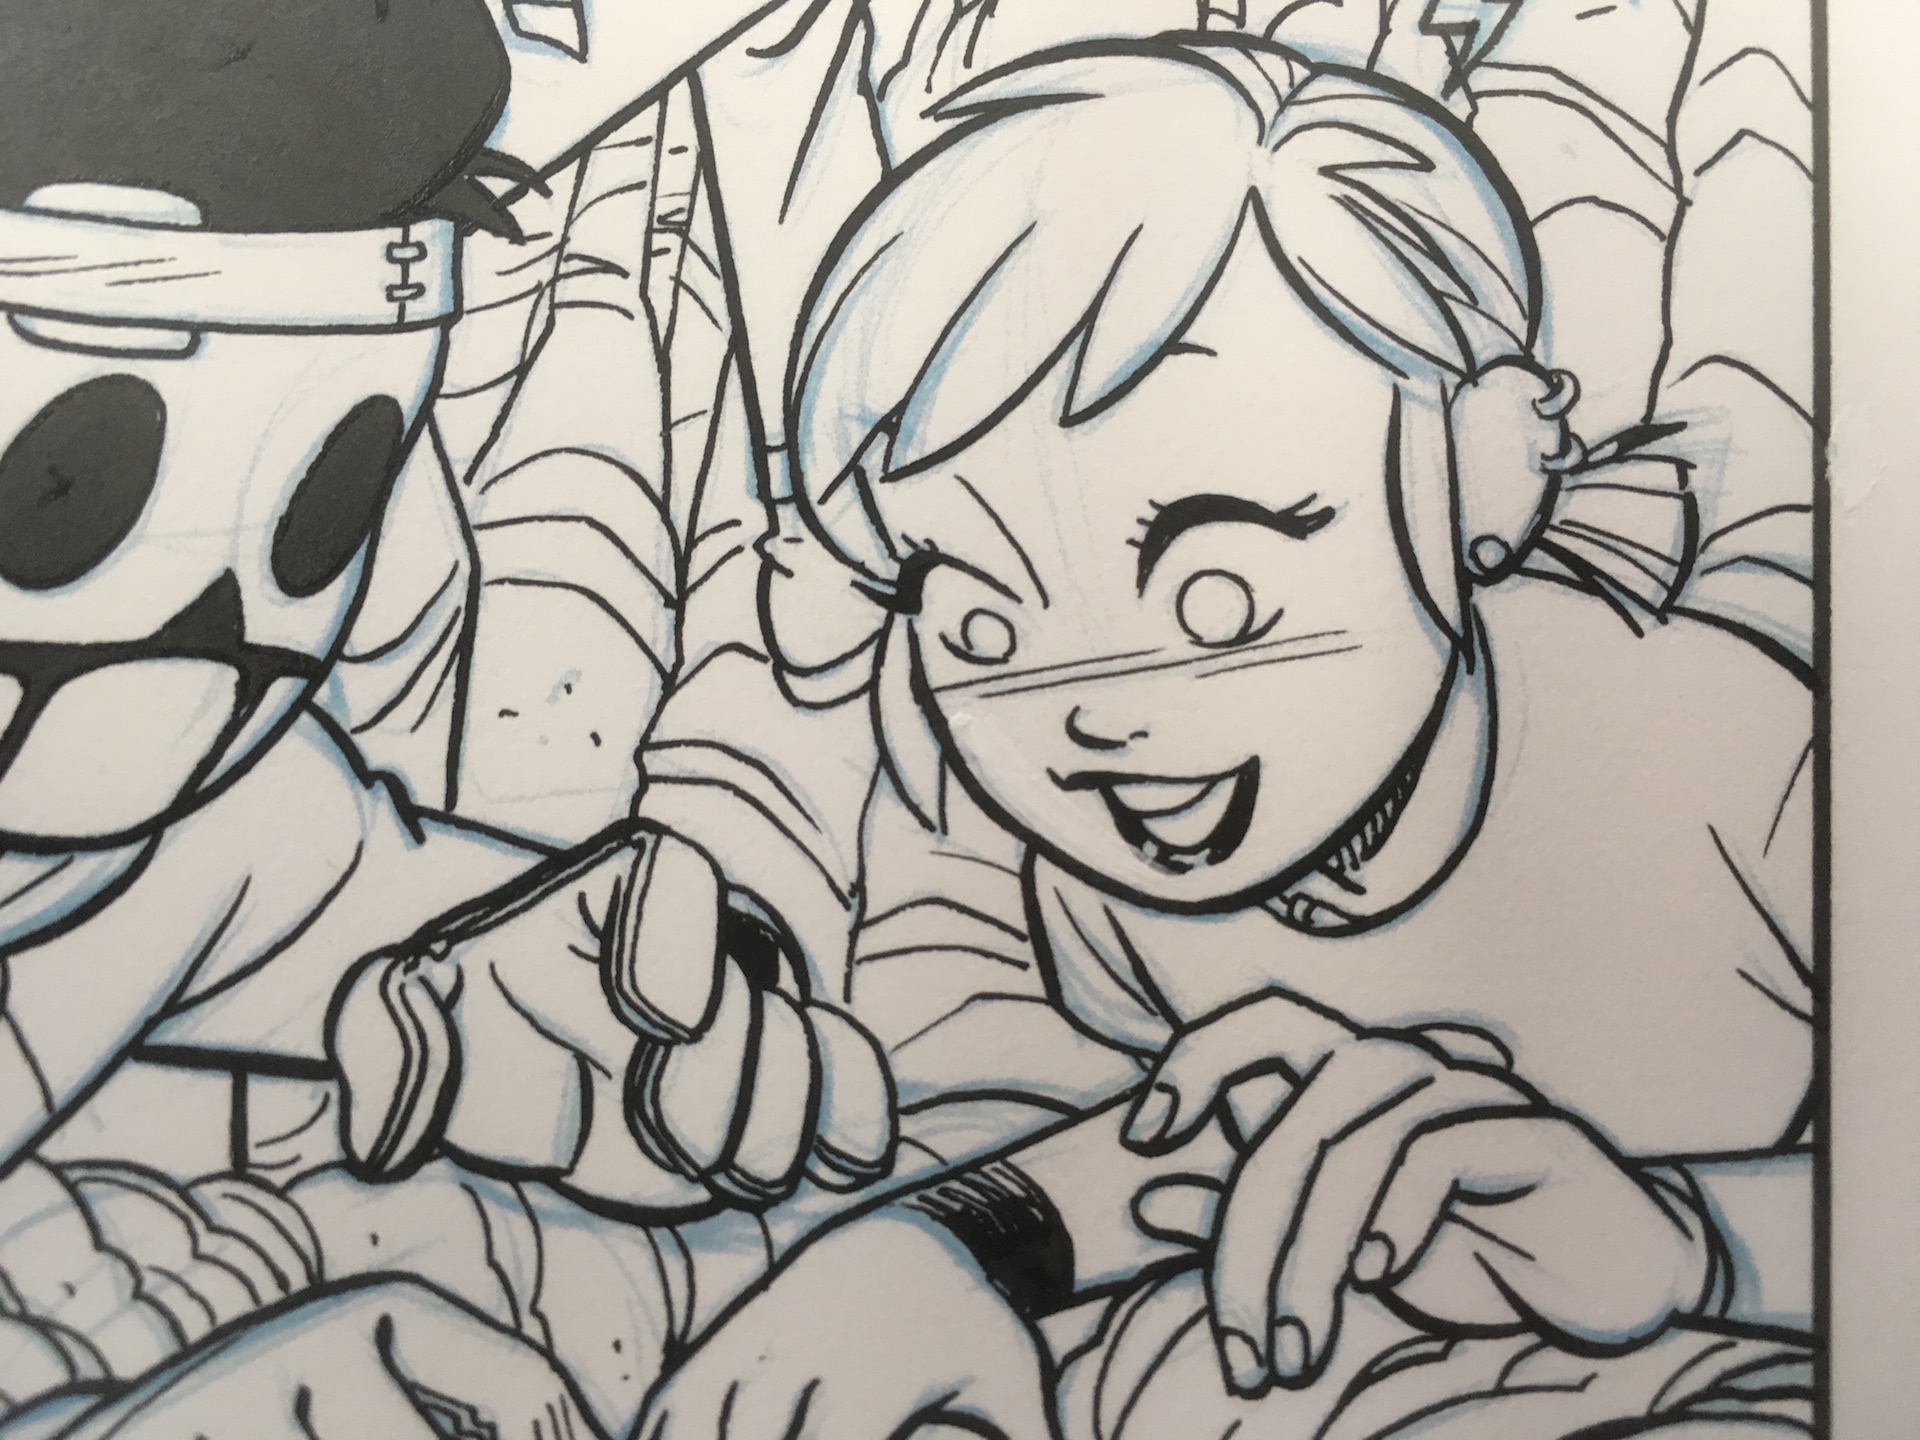
My hand slipped drawing the line that makes up the left side of Gretchen’s face and now it needs to be fixed.
During the inking phase, I made a few errors and smudges I needed to clean up.
White ink cleaned this smudge right up. I touched up the lines a little bit with a fine felt tip pen.
White ink cleaned this up as well.Moving Gretchen’s mouth was a little trickier! I liked the way I’d drawn it, but it was in the wrong place. So I lightboxed it onto another piece of paper, cut it out, and glued it back in the right place.White ink on a brush cleaned this line up very nicely. I did have to go back in and touch up Gretchen’s lip with a pen.I finally had all the inking and corrections done, and I was ready to scan!I have a scanner capable of scanning pages up to 13×19 now, so I was able to scan the page in two parts, then rearrange them. It’s a relief to have it back in the right order!
I made the scan in color, then used Photoshop to make the linework nice and crisp.
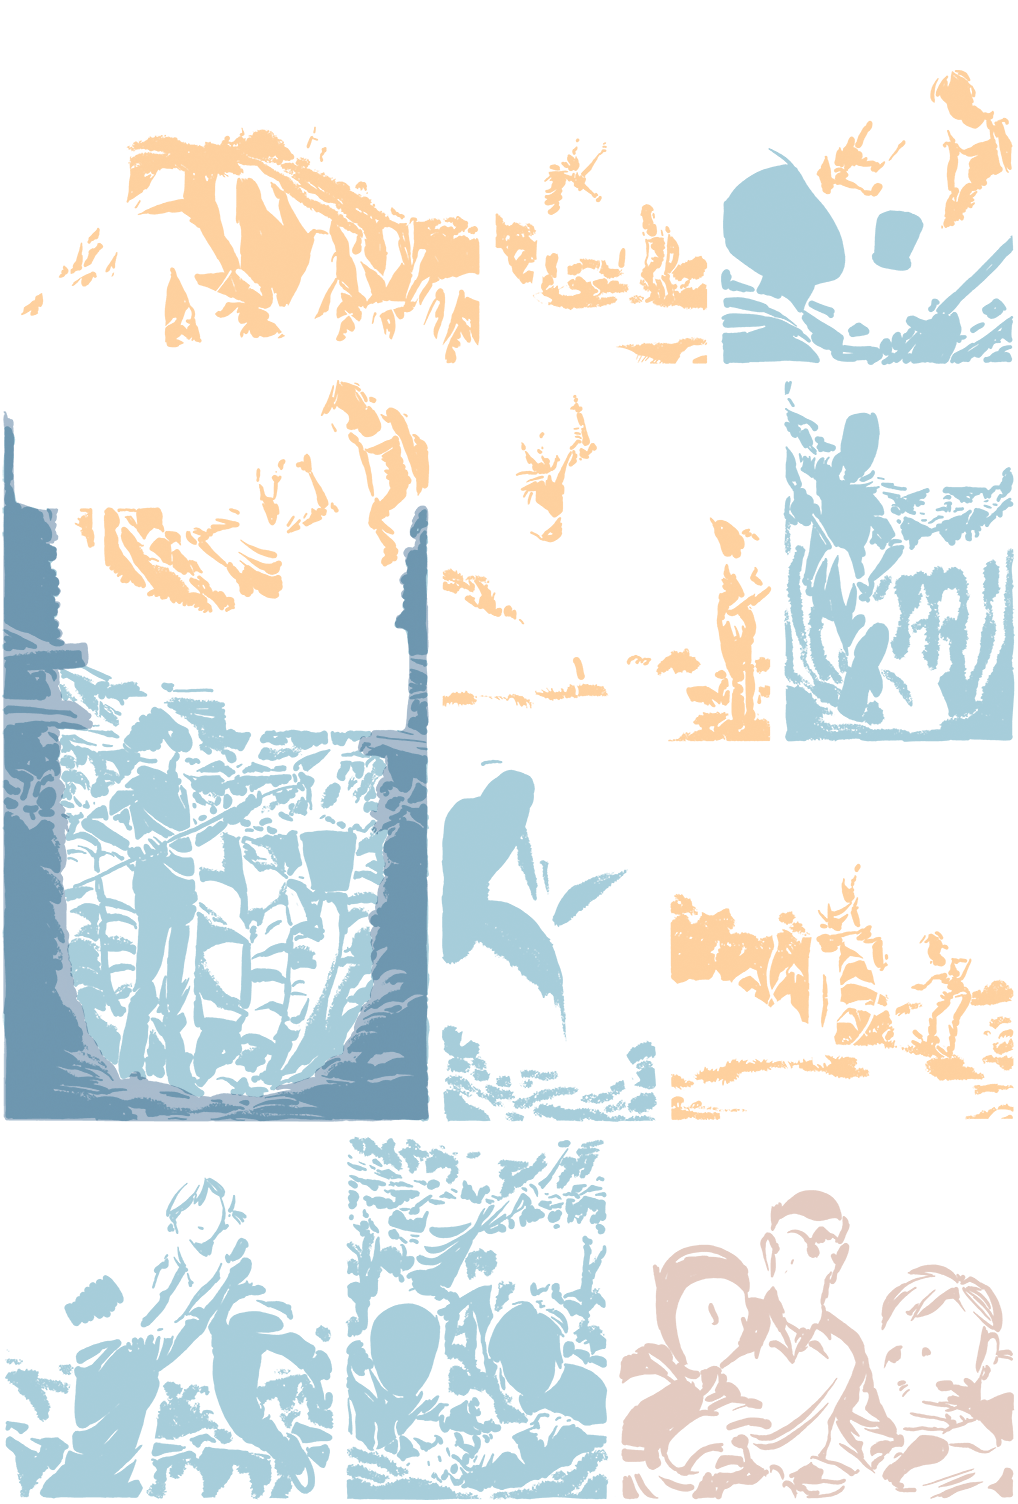
Once I had my page in Photoshop, I used two plugins I bought called “Multifill” and “Flatten Pro” to do the basic work of filling in all my closed lines with color. It’s a huge time saver. It also creates this pleasant stained glass effect.I then spent a couple hours with the paint bucket tool putting the basic colors down. It’s almost ready to post at this point, but I like to spend more time getting the colors to look better.After a little while, I had made some changes in my color choices, added in some nice gradients on the sky, and made everyone’s cheeks pink. When I started this comic I would leave it at this point, but now I like to do a little more work adding some shadows to make everything look a little more rounded. I need to go back and add some shadows on to the older pages now!I drew the shadows on another layer (though sometimes I use more than one!) using colors that I think will enhance the mood of the scene. I’ll then put this layer of colors over my regular colors, usually using the “multiply” setting but sometimes playing with other settings.This is what it looks like with the shadows laid over the colors! It makes the whole thing look deeper, doesn’t it? Now I’m really almost done, but there’s one more step:I added in one more layer– a copy of the linework just a few pixels smaller, and kind of purplish. This is called a trap layer, and what it does is make sure that there is a solid color behind every area of black on the page. When printed, black ink is slightly transparent, and you can sometimes see the colors that are printed underneath it. This step prevents that from happening.At that point, I just added the dialogue back in, and the page was all done!
I hope this was interesting! Feel free to leave a comment if you’ve got any questions about anything.
Thanks for sharing your process, Les! Always welcome — keep up the great work.
Your workflow is a nice blend of digital and traditional techniques. Have you ever tried inking in Photoshop or Clip Studio? If so, what led you back to traditional pen and ink work?
Also, do you maintain separate layers for the effects you apply during coloring or do you flatten as you go along?
I’ve worked in both! I worked in character design for animation from 2013-2015, and I did all that work in Photoshop. My graphic novel Old Souls, written by Brian McDonald, coming out on June 25th from First Second, was drawn entirely in Clip Studio from start to finish. They’re both good! I’d say I like CSP for drawing quite a bit more, but PS is good too.
I like to ink this comic with traditional materials for two reasons– I started it way back in 2004 when I only had a first-gen Intuos tablet, with which I was never able to draw very well, and I want to maintain a continuity with that, and also I really like the way real ink and real tools can do something surprising that I’m not expecting but works better than what I’d planned. Of course, just as often, I mess it up and have to paint over smudges all over the place.
I used to flatten to save storage space on my drives, but now I keep the effect layers separate so I can edit them more easily. Also, starting with page 105 my friend Jon Siruno is taking over most of the coloring work and I’ve been going in and making some tweaks when he’s done, which is much easier with layered files.
I’ve got a combo printer/scanner, an Epson WF-7620. I’m not sure if they still make them, I bought it about five or six years ago. They’ve got other models that do the same thing. It’s not the best scanner and it’s pretty bad with color, but for scanning linework it does the job well.
Thanks for that information and the warning about the color scanning not being great, they have a newer model. I had never considered those all in one products would be that large. The price might be worth me giving it a try though. Seriously cheaper than a professional scanner that can scan that large.
I love looking at Artist Processes – I always see something that I can apply to my own work. The way you do all the color layers just underlines how much a good colorist can make a good comic into a great comic. The legendary Mary Severin comes to mind. Kudos!
I have the comments set to require approval, and sometimes even a previously approved commenter gets a little hiccup. It was probably something to do with that.
(I have to manually approve new commenters or I get completely inundated with comment spam!)
Just finished reading the first jonnny crossbones published in french by akileos. And I have just seen the making off. Congratulations, i really enjoyed the work. Many thanks.


Very interesting!
I like your psychedelic flats 😀
Me too!
Thanks for sharing your process, Les! Always welcome — keep up the great work.
Your workflow is a nice blend of digital and traditional techniques. Have you ever tried inking in Photoshop or Clip Studio? If so, what led you back to traditional pen and ink work?
Also, do you maintain separate layers for the effects you apply during coloring or do you flatten as you go along?
I’ve worked in both! I worked in character design for animation from 2013-2015, and I did all that work in Photoshop. My graphic novel Old Souls, written by Brian McDonald, coming out on June 25th from First Second, was drawn entirely in Clip Studio from start to finish. They’re both good! I’d say I like CSP for drawing quite a bit more, but PS is good too.
I like to ink this comic with traditional materials for two reasons– I started it way back in 2004 when I only had a first-gen Intuos tablet, with which I was never able to draw very well, and I want to maintain a continuity with that, and also I really like the way real ink and real tools can do something surprising that I’m not expecting but works better than what I’d planned. Of course, just as often, I mess it up and have to paint over smudges all over the place.
I used to flatten to save storage space on my drives, but now I keep the effect layers separate so I can edit them more easily. Also, starting with page 105 my friend Jon Siruno is taking over most of the coloring work and I’ve been going in and making some tweaks when he’s done, which is much easier with layered files.
Thanks for posting this, great to see the whole process. Also, those plugins seem really good, I’ll be checking them out.
Curious what scanner you use that can scan up to 13×19? I’ve been looking for one.
I’ve got a combo printer/scanner, an Epson WF-7620. I’m not sure if they still make them, I bought it about five or six years ago. They’ve got other models that do the same thing. It’s not the best scanner and it’s pretty bad with color, but for scanning linework it does the job well.
Thanks for that information and the warning about the color scanning not being great, they have a newer model. I had never considered those all in one products would be that large. The price might be worth me giving it a try though. Seriously cheaper than a professional scanner that can scan that large.
Here’s a link to the plugins: https://peltmade.com/psplugins-flatting.html
The license for Flatten Pro isn’t cheap, but if you’re doing a lot of pages for profit, it’s well worth the investment!
I love looking at Artist Processes – I always see something that I can apply to my own work. The way you do all the color layers just underlines how much a good colorist can make a good comic into a great comic. The legendary Mary Severin comes to mind. Kudos!
Thank you for sharing! That’s really interesting. I love seeing the process.
Very cool! I had *no* idea how many steps were involved in making this. Dang, I can’t wait for the book.
Very cool! I had *no* idea how many steps were involved in making this.
Whoops! Don’t know why it double posted!
I have the comments set to require approval, and sometimes even a previously approved commenter gets a little hiccup. It was probably something to do with that.
(I have to manually approve new commenters or I get completely inundated with comment spam!)
This is so cool to see the full process. Thanks for sharing
Just finished reading the first jonnny crossbones published in french by akileos. And I have just seen the making off. Congratulations, i really enjoyed the work. Many thanks.
I come back and read your process posts over and over, Les. Thanks very much for doing them.
I’m glad you get something out of them!